AWS Cloud Operations & Migrations Blog
Use AWS Systems Manager custom Inventory to locate Log4j files on managed nodes
In this post we will provide guidance to assist customers responding to the recently disclosed Log4j vulnerability by detailing how to use AWS Systems Manager Inventory to locate Log4j JAR files on Linux and Windows Amazon Elastic Compute Cloud (EC2) instances and hybrid managed nodes. A hybrid managed node includes on-premises servers, edge devices, and virtual machines (VMs) that are configured for AWS Systems Manager, including VMs in other cloud environments.
This post will walk you through an example of how to use the custom inventory data type to locate Log4j JAR files on Windows and Amazon Linux EC2 instances and hybrid managed nodes. We’ll use PowerShell scripts to collect metadata from Windows managed instances, and Shell scripts to collect metadata from Amazon Linux managed instances. This can be extended to other Linux operating systems by modifying the Shell commands appropriately.
Note that Log4j may also be present in other files as a bundle or as a shaded library. AWS recommends that customers do an extensive search beyond log4j-core-*.jar files.
The Log4j vulnerability (CVE-2021-44228, CVE-2021-45046) is a critical vulnerability (CVSS 3.1 base score of 10.0) in the ubiquitous logging platform Apache Log4j. This vulnerability allows an attacker to perform a remote code execution on the vulnerable platform. Version 2 of Log4j, between versions 2.0-beta-9 and 2.15.0, is affected.
As an immediate response, follow this post and use the tool designed to hotpatch a running JVM using any Log4j 2.0+. Steve Schmidt, Chief Information Security Officer for AWS, also discussed this hotpatch. For additional information on how to use AWS security services in relation to the Log4j vulnerability, see Using AWS security services to protect against, detect, and respond to the Log4j vulnerability.
About AWS Systems Manager Inventory
AWS Systems Manager Inventory provides a centralized way to collect and query system, application, and instance metadata. By using the resource data sync feature, you can sync this metadata to Amazon Simple Storage Service (Amazon S3). In Amazon S3, you can aggregate the metadata for different AWS Regions and accounts. After you sync this inventory data to Amazon S3, you can create various data visuals using Amazon Athena and Amazon QuickSight.
With this feature, you can scan all of your servers and instances and centralize the data for reporting. This will help you quickly identify which servers need to be patched or updated. For more information about patching managed nodes across multiple accounts and Regions, see Scheduling centralized multi-account and multi-Region patching with AWS Systems Manager Automation.
Prerequisites
Amazon Elastic Compute Cloud (EC2) instances; AWS Internet of Things (IoT) Greengrass core devices; and on-premises servers, edge devices, and VMs must be Systems Manager managed nodes to be monitored and have inventory metadata gathered. This means your nodes must meet certain prerequisites and be configured with the AWS Systems Manager Agent (SSM Agent). For more information, see Setting up AWS Systems Manager.
Create the custom Inventory document
By default, you can use AWS-GatherSoftwareInventory document to collect Inventory data. However, for this use case, we’ll create a custom document to execute a PowerShell script and a Shell script to locate Log4j JAR files before Inventory collection begins.
To create the custom Inventory document using AWS CloudFormation, see the section Use CloudFormation StackSets to deploy the document and association across AWS accounts and Regions section in this post.
Open the following GitHub page, and download the customInventoryLog4jDocument.yml file:
Option 1: Create the document using the AWS Management console
Create the document in the AWS console by going to the AWS Systems Manager console, and in the navigation pane select Documents.
- On the Documents page, choose Create document, and choose Command or Session.
- For Name, enter a descriptive name, such as customInventoryLog4j.
- For Content, choose YAML, remove the sample content, paste the content from the GitHub customInventoryLog4jDocument.yml file, and choose Create document.
Option 2: Create the document using the AWS Command Line Interface (AWS CLI)
Create the document by running the aws-cli command that creates the document:
Verify the document’s status by running the following command:
The following is a sample output that you should see:
Create an association using the custom InventoryLog4j document
To create the AWS Systems Manager State Manager association using CloudFormation, see the section below labeled “Use CloudFormation StackSets to deploy the document and association across AWS accounts and Regions”.
Now that the inventory policy document is created, we will create a State Manager association to associate this policy document to the targeted instances.
- Open the AWS Systems Manager console.
- In the navigation pane, choose State Manager.
- On the Associations page, choose Create association.
- For Association name, enter a descriptive name, such as customInventory_Log4j.
- For Document, filter the document list using Document name prefix: Equals: customInventoryLog4j and select the custom document that you previously created.

Next, paste the following PowerShell script and Linux shell script into the corresponding parameter (as shown in the following screenshot).
These scripts are executed by the aws:runPowerShellScript plugin on Windows managed instances and the aws:runShellScript plugin on Linux managed instances before the Inventory plugin is invoked.
Open the following GitHub page and download the customInventoryLog4jPowerShell.ps1 file and customInventoryLog4jShell.sh file.
PowerShell Script:
Shell Script:
These scripts scan the file system on the target managed node to locate Log4j JAR files regardless of the version. The scripts log the file name and path in a local JSON file, which is created in the custom inventory directory. Then, the JSON file is collected by the Inventory data gathering process and reported to Systems Manager.
Windows:
%SystemDrive%\ProgramData\Amazon\SSM\InstanceData\node-id\inventory\custom
Linux:
/var/lib/amazon/ssm/node-id/inventory/custom

Following this step, you must pick instances that you want to target with this Association. In addition, define a schedule for this inventory collection. Optionally, you can specify a compliance severity for this association.
After you pick the instances and schedule, choose Create Association, and that’s it. After the policy runs on the targeted instances, Log4j JAR file locations will be collected and reported to Systems Manager Inventory.
Go to Fleet Manager, and check an instance by choosing the Inventory tab. The following screenshot shows the new custom Inventory data type for one of my Windows EC2 instances.

If there are no results for the inventory, then this is most likely because there are no matched files located. To confirm, check the status of the association. If the association status is successful, then that confirms no files were found. If the association status is failed, then select the radio button next to the association name and choose view output for more details.


You can filter a list of managed nodes using the GetInventory API. For example, you can run the following AWS CLI command to return a list of managed nodes that have a Log4j file:
Then, you can port all of the inventory metadata across your AWS accounts and Regions to a central Amazon S3 bucket by using resource data sync and query the data, which are made available as JSON objects.
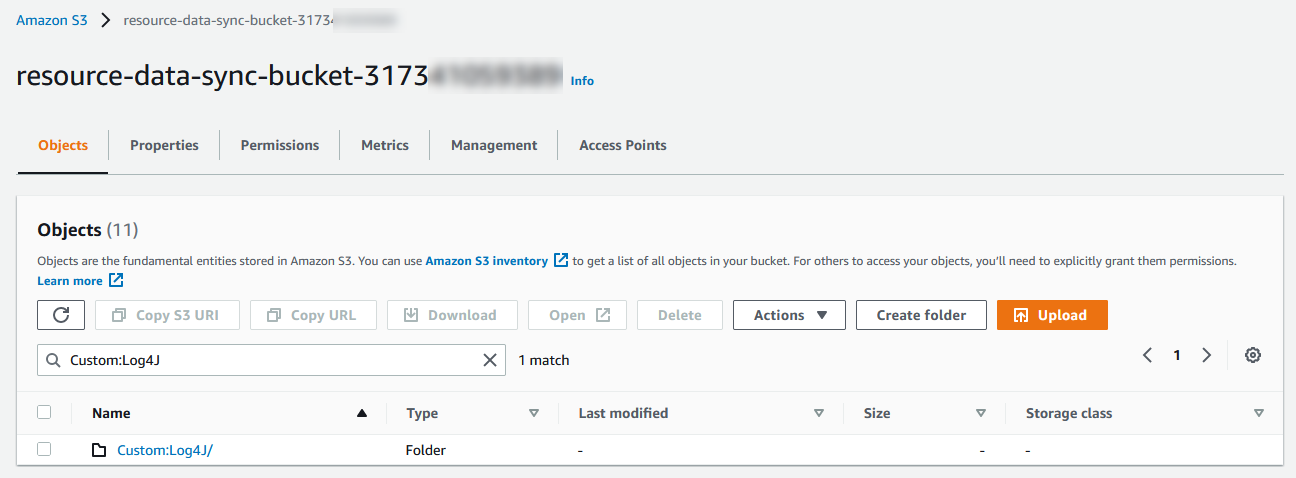
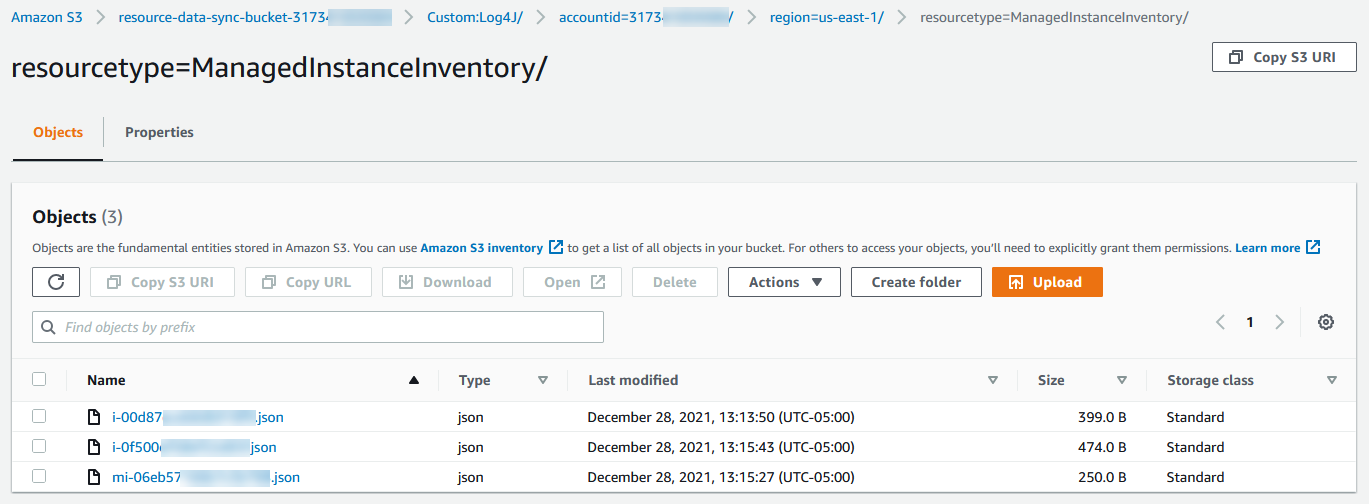
The data in Amazon S3 lets you run queries against the instance inventory using Amazon Athena, and, if you choose, use Amazon QuickSight to visualize the inventory of your instances. For example, you can use the following query to return a list of managed nodes across your accounts and Regions that have log4j JAR files:

Use CloudFormation StackSets to deploy the document and association across AWS accounts and Regions
The above process details how to create the Systems Manager document and State Manager association within a given AWS account and Region. If you manage multiple AWS accounts or have managed nodes in other AWS Regions, then you can use AWS CloudFormation StackSets to create the Systems Manager document and State Manager association in those target locations.
Make sure that your management and target accounts are set up with the permissions required for these stacks to run. For more information, check the prerequisites for stack set operations in the AWS CloudFormation documentation. If you don’t have this setup or want to avoid using StackSets, then you can use individual CloudFormation stacks in each target account.
Open the following GitHub page and download the customInventoryLog4jCloudFormationTemplate.yml file.
This template creates the Systems Manager custom inventory document and the State Manager association in your target accounts.
- In the management account, go to the AWS CloudFormation console, and from the left navigation pane, choose StackSets, and then choose Create StackSet.
- On the Choose a template page, perform the following steps:
- The content of the Permissions section varies, depending on whether you have AWS Organizations enabled:
- If you do not have AWS Organizations enabled, choose Self service permissions, and then choose Next.
- If you have AWS Organizations enabled, you can choose Service managed permissions to apply the StackSets to an organization or OU. For more manual control, you can also choose Self service permissions. In this case, choose Self service permissions to add a list of accounts as targets.
- For Prerequisite – Prepare template, leave the default Template is ready.
- For Specify template, select Upload a template file, select Choose file, choose the
customInventoryLog4jCloudFormationTemplate.ymlfile, and then choose Next.
- The content of the Permissions section varies, depending on whether you have AWS Organizations enabled:
- On the Specify StackSet details page, perform the following steps:
- For StackSet name, enter a descriptive name, such as customInventoryBlog.
- For tagKey, enter the tag key for the managed instances where you want to collect the custom inventory metadata.
- For tagValue, enter the tag value for the managed instances where you want to collect the custom inventory metadata.
- Choose Next.

- On the Configure StackSet options page, leave the default value for Execution configuration, and choose Next.
- On the Set deployment options page, perform the following steps:
- For Deployment targets, choose to deploy to the entire AWS organization or choose to deploy to specific AWS organizational units (OUs).
- For Specify regions, select the regions where you have Systems Manager managed nodes.
- Choose Next.

- On the next page, review the options and parameters selected, then choose Submit to submit your StackSet configuration.
After the page is refreshed, you will be able to see your StackSet. The status will change to SUCCEEDED after it’s been created.
Cleanup
To delete the association created in this post, navigate to the State Manager console, select the association that you created, and choose Delete.
To delete the custom document, navigate to the Documents console, choose the Owned by me tab, select the custom document that you created, choose Actions, and choose Delete document.
To delete the custom inventory schema and all of the data for it, run the following command:
To delete the CloudFormation StackSet, go to the AWS CloudFormation console in the management account. From the left navigation pane, choose StackSets, and then choose the StackSet that you created. From Actions, choose Delete stacks from StackSet, enter the AWS OU ID, choose Add all regions, choose Next, and choose Submit. Once all of the Stack instances have been deleted, choose Actions and choose Delete StackSet to remove the StackSet.
Conclusion
In this post, I showed you how to use Systems Manager custom Inventory to locate Log4j JAR files within the file system of managed instances and report the filename and path as custom Inventory objects. This lets you collect and then send Custom Inventory data from an instance every time that the Inventory policy is run. Then the data can be queried at both the fleet and instance level.
I also showed you how to provision this custom inventory document and State Manager association across your AWS accounts and Regions using CloudFormation StackSets.
You can aggregate patching, compliance, and inventory data into a single location by creating a Resource Data Sync. This syncs this data with a centralized S3 bucket of your choosing. For more information, check configuring Resource Data Sync for Inventory.
After creating the Resource Data Sync, you can configure Amazon Athena and Amazon QuickSight to start visualizing patching and inventory-related data. For more information, check querying inventory data from multiple Regions and accounts.