AWS Robotics Blog
Preparing ROS application and simulation containers for AWS RoboMaker
In October 2021, we released support for containers in AWS RoboMaker to make it easier for more customers to bring and run their simulations. In this blog, we show you how to use containers to build and package Robot Operating System (ROS) applications to run in AWS RoboMaker.
When AWS RoboMaker was first released, we created a purpose-built format for packaging ROS applications with dependencies called a bundle. However, we found customers often used a variety of simulation tools and custom software packages with different package managers, dependencies, build tools, and execution workflows along with their ROS stack. This made it difficult to build and package all of their applications and dependencies in a bundle. We also found many ROS developers continued to use first-generation catkin build tooling and/or already had container images of their simulation tools and robot applications.
With support for containers, customers can now bring their containerized ROS applications with few modifications. The new feature now supports applications written for any ROS release, the build tool of your choice, and a variety of simulation tools. This includes but is not limited to Ignition Gazebo, Drake, NVidia Isaac Sim and high fidelity rendering engines such as Unity and Unreal.
Background
Using colcon to build ROS applications in container images
To bring applications into a RoboMaker simulation job in the past, customers would use colcon to build their ROS workspaces, then colcon bundle to create a single-file artifact with included dependencies. This file could be copied, extracted, and executed anywhere, including in AWS RoboMaker. However, the colcon bundle tool is designed to install dependencies with rosdep or pip. Therefore, any dependencies installed or configured outside of those package management tools would be missed.
In the walkthrough below, we will continue using colcon to build the ROS application workspace and rosdep to install application dependencies. However, instead of generating bundles, we will create Docker images that can be extended to support any additional software package and configuration required.
More about building ROS applications with colcon
ROS developers often start with a workspace, a folder where developers modify, build, and install ROS packages. A ROS package contains libraries, datasets, configuration files, and anything else that comprises a useful software module. When using colcon, both ROS1 and ROS2 workspaces usually have the following structure:
- src : The directory that stores source code for any ROS packages. This is where code from version control systems (i.e. Git) is cloned and stored.
- build : The directory that stores all built files before they are staged to be installed.
- install : The directory that stores the built workspace, staged to be installed. This directory includes a setup.sh/setup.bash file that is used to source the application before running.
- logs : This directory stores all of the build logs to troubleshoot the build process.
When you run colcon build in a workspace for the first time, it will create and populate the build, install, and logs folder in the above directory structure. During a build, colcon will crawl through the workspace and look for ROS packages. They are identified and defined with a manifest file (package.xml) in each package directory. If an ROS package uses CMake, colcon will build and install the application following the instructions in the included CMakeLists.txt.
ROS developers also commonly use rosdep, a dependency management tool that crawls through the workspace and installs dependencies defined in each manifest (package.xml) file. The build and install instructions for most ROS packages end up being a variation of these five steps:
- mkdir -p my_workspace/src && cd my_workspace (Create a new workspace)
- git clone <path-to-ros-package-src> src/<my-ros-package> (Clone the ROS package you are developing)
- rosdep update (Update the sources lists of dependencies in ROS deps)
- rosdep install –from-paths src -i -r -y (Crawl through the ROS workspace and install any required dependencies on the host)
- colcon build –install-base <path-to-some-install-directory> (Build and install the ROS package)
Walkthrough
In this section, we will show how to build and package your ROS applications in a container image that can run in AWS RoboMaker, instead of using a bundle (tar) file. In this walkthrough, you will:
- Clone the Hello World sample application. Note: You could also use your ROS application workspace(s).
- Create a standard Dockerfile with entrypoint script.
- Build two Docker images. One for each workspace in the HelloWorld sample application, a robot application and simulation application.
- Publish Docker images to Amazon ECR, a container registry in the cloud.
- Create simulation and robot applications that reference your Docker images in AWS RoboMaker.
- Create an IAM role with permissions to pull Docker images from Amazon ECR.
- Launch and interact with the Hello World simulation running in AWS RoboMaker.
Prerequisites
To run the following example below, you will need to have Docker, the AWS CLI, and the VCS Tool installed on your machine.
- Installing the AWS CLI: https://docs.aws.amazon.com/cli/latest/userguide/getting-started-install.html
- Installing Docker: https://docs.docker.com/get-docker/
- Installing the VCS Import Tool (if you use it):
sudo pip3 install vcstool
You will also need an AWS account with an IAM user or role with the following permissions:
- Create an IAM role
- Create RoboMaker resources (Simulation Job, Robot and Simulation Applications)
- Create and upload Amazon ECR repositories
Finally, you will need to know your account number and select a region to run the simulation in. AWS RoboMaker is supported in the following regions listed here.
Build a docker image from a ROS workspace for AWS RoboMaker
- Clone the hello world repository.
Note: In the AWS Robotics sample applications, the code is already structured with ROS workspace directories. Therefore, you don’t need to create a workspace and source code directory. However, for most open source ROS packages and likely for your code, first create your workspace directory and clone the source code into <workspace>/src.git clone https://github.com/aws-robotics/aws-robomaker-sample-application-helloworld.git helloworld && cd helloworld - Import dependencies defined in
.rosinstallto each source directory using vcs import.vcs import robot_ws < robot_ws/.rosinstall vcs import simulation_ws < simulation_ws/.rosinstall - Create a new file named
Dockerfilein thehelloworlddirectory and copy/paste the following:
Note: To get started, we’ve provided a sampleDockerfilebelow that will work with ROS workspaces. If you are using your own ROS workspace, you can adapt this file with your own instructions.When building Docker images there are a few helpful terms and tricks to know. First, a Dockerfile is an instruction set used to build Docker images. This approach uses a multi-stage build and integrated caching with Docker BuildKit. Multi-stage builds allow workflows with separate build steps, so the build dependencies and source code is not copied into the runtime image. This reduces the size of the Docker image and improves performance. The caching operations speed up future builds by storing previously built files. To learn more about Docker BuildKit, click here.
Read through the comments in the
Dockerfileto get a sense for what is being built and adapt as necessary. For ease of development, theDockerfileis based on the official ROS Docker images maintained by Open Source Robotics Foundation (OSRF). However, when running in production, you may choose to build the ROS base image with the OSRF source instruction-set in GitHub to prevent impact from upstream changes.# ======== ROS/Colcon Dockerfile ======== # This sample Dockerfile will build a Docker image for AWS RoboMaker # in any ROS workspace where all of the dependencies are managed by rosdep. # # Adapt the file below to include your additional dependencies/configuration outside of rosdep. # ======================================= # ==== Arguments ==== # Override the below arguments to match your application configuration. # =================== # ROS Distribution (ex: melodic, foxy, etc.) ARG ROS_DISTRO=melodic # Application Name (ex: helloworld) ARG APP_NAME=robomaker_app # Path to workspace directory on the host (ex: ./robot_ws) ARG LOCAL_WS_DIR=workspace # User to create and use (default: robomaker) ARG USERNAME=robomaker # The gazebo version to use if applicable (ex: gazebo-9, gazebo-11) ARG GAZEBO_VERSION=gazebo-9 # Where to store the built application in the runtime image. ARG IMAGE_WS_DIR=/home/$USERNAME/workspace # ======== ROS Build Stages ======== # ${ROS_DISTRO}-ros-base # -> ros-robomaker-base # -> ros-robomaker-application-base # -> ros-robomaker-build-stage # -> ros-robomaker-app-runtime-image # ================================== # ==== ROS Base Image ============ # If running in production, you may choose to build the ROS base image # from the source instruction-set to prevent impact from upstream changes. # ARG UBUNTU_DISTRO=focal # FROM public.ecr.aws/lts/ubuntu:${UBUNTU_DISTRO} as ros-base # Instruction for each ROS release maintained by OSRF can be found here: https://github.com/osrf/docker_images # ================================== # ==== Build Stage with AWS RoboMaker Dependencies ==== # This stage creates the robomaker user and installs dependencies required to run applications in RoboMaker. # ================================== FROM public.ecr.aws/docker/library/ros:${ROS_DISTRO}-ros-base AS ros-robomaker-base ARG USERNAME ARG IMAGE_WS_DIR RUN apt-get clean RUN apt-get update && apt-get install -y \ lsb \ unzip \ wget \ curl \ xterm \ python3-colcon-common-extensions \ devilspie \ xfce4-terminal RUN groupadd $USERNAME && \ useradd -ms /bin/bash -g $USERNAME $USERNAME && \ sh -c 'echo "$USERNAME ALL=(root) NOPASSWD:ALL" >> /etc/sudoers' USER $USERNAME WORKDIR /home/$USERNAME RUN mkdir -p $IMAGE_WS_DIR # ==== ROS Application Base ==== # This section installs exec dependencies for your ROS application. # Note: Make sure you have defined 'exec' and 'build' dependencies correctly in your package.xml files. # ======================================== FROM ros-robomaker-base as ros-robomaker-application-base ARG LOCAL_WS_DIR ARG IMAGE_WS_DIR ARG ROS_DISTRO ARG USERNAME WORKDIR $IMAGE_WS_DIR COPY --chown=$USERNAME:$USERNAME $LOCAL_WS_DIR/src $IMAGE_WS_DIR/src RUN sudo apt update && \ rosdep update && \ rosdep fix-permissions # Note: This will install all dependencies. # You could further optimize this by only defining the exec dependencies. # Then, install the build dependencies in the build image. RUN rosdep install --from-paths src --ignore-src -r -y # ==== ROS Workspace Build Stage ==== # In this stage, we will install copy source files, install build dependencies and run a build. # =================================== FROM ros-robomaker-application-base AS ros-robomaker-build-stage LABEL build_step="${APP_NAME}Workspace_Build" ARG APP_NAME ARG LOCAL_WS_DIR ARG IMAGE_WS_DIR RUN . /opt/ros/$ROS_DISTRO/setup.sh && \ colcon build \ --install-base $IMAGE_WS_DIR/$APP_NAME # ==== ROS Robot Runtime Image ==== # In the final stage, we will copy the staged install directory to the runtime image. # ================================= FROM ros-robomaker-application-base AS ros-robomaker-app-runtime-image ARG APP_NAME ARG USERNAME ARG GAZEBO_VERSION ENV USERNAME=$USERNAME ENV APP_NAME=$APP_NAME ENV GAZEBO_VERSION=$GAZEBO_VERSION RUN rm -rf $IMAGE_WS_DIR/src COPY --from=ros-robomaker-build-stage $IMAGE_WS_DIR/$APP_NAME $IMAGE_WS_DIR/$APP_NAME # Add the application source file to the entrypoint. WORKDIR / COPY entrypoint.sh /entrypoint.sh RUN sudo chmod +x /entrypoint.sh && \ sudo chown -R $USERNAME /entrypoint.sh && \ sudo chown -R $USERNAME $IMAGE_WS_DIR/$APP_NAME ENTRYPOINT ["/entrypoint.sh"] - Create a new file called
entrypoint.sh.
Note: AnENTRYPOINTfile is an executable that will run when the docker container is spawned. We are using an entrypoint to source the ROS workspace, so we can easily runroslaunchcommands in AWS RoboMaker.
- Copy/paste the following into the new file
#!/bin/bash set -e source "/home/$USERNAME/workspace/$APP_NAME/setup.bash" if [[ -f "/usr/share/$GAZEBO_VERSION/setup.sh" ]] then source /usr/share/$GAZEBO_VERSION/setup.sh fi printenv exec "${@:1}" - Now, run the following commands to build the robot application container image:
DOCKER_BUILDKIT=1 docker build . \ --build-arg ROS_DISTRO=melodic \ --build-arg LOCAL_WS_DIR=./robot_ws \ --build-arg APP_NAME=helloworld-robot-app \ -t robomaker-helloworld-robot-app - Then again, to build the simulation application:
DOCKER_BUILDKIT=1 docker build . \ --build-arg GAZEBO_VERSION=gazebo-9 \ --build-arg ROS_DISTRO=melodic \ --build-arg LOCAL_WS_DIR=./simulation_ws \ --build-arg APP_NAME=helloworld-sim-app \ -t robomaker-helloworld-sim-app - Run the command
docker imagesto confirm the docker images have been successfully built. The output should be:Administrator:~/environment/helloworld (ros1) $ docker images REPOSITORY TAG IMAGE ID CREATED SIZE robomaker-helloworld-sim-app latest 5cb08816b6b3 17 minutes ago 2.8GB robomaker-helloworld-robot-app latest b5f6f755feec 2 hours ago 2.79GB
Congratulations! You have successfully built your Docker images and can now upload and run them in AWS RoboMaker.
Note: To use this approach with your own ROS application, run through the same process above and change the build arguments to match your application:
# Alternative/optional approach to build with your own ROS workspace
DOCKER_BUILDKIT=1 docker build . \
--build-arg GAZEBO_VERSION=<YOUR GAZEBO VERSION> \
--build-arg ROS_DISTRO=<YOUR ROS DISTRO> \
--build-arg LOCAL_WS_DIR=<PATH TO YOUR WORKSPACE> \
--build-arg APP_NAME=<YOUR APPLICATION NAME> \
-t <YOUR APPLICATION TAG NAME>
Publish docker images to Amazon ECR
Containers used by AWS RoboMaker in a simulation job must be stored in Amazon Elastic Container Registry (ECR), a fully-managed container registry. Upload your container images in the steps following:
- Set a few environment variables that can be reused in the next set of commands. Remember to replace
<YOUR AWS ACCOUNT NUMBER>and<YOUR AWS REGION>with your account number and regionexport robotapp=robomaker-helloworld-robot-app export simapp=robomaker-helloworld-sim-app export account=<YOUR AWS ACCOUNT NUMBER> export region=<YOUR AWS REGION> export ecruri=$account.dkr.ecr.$region.amazonaws.com - Sign-in to Amazon ECR and create two new repositories.
aws ecr get-login-password --region $region | docker login --username AWS --password-stdin $ecruri aws ecr create-repository --repository-name $robotapp aws ecr create-repository --repository-name $simapp - Tag Docker images with the Amazon ECR URI.
docker tag $robotapp $ecruri/$robotapp:latest docker tag $simapp $ecruri/$simapp:latest - Upload the Docker images to Amazon ECR.
docker push $ecruri/$robotapp docker push $ecruri/$simapp - Run the following describe statements to ensure your images are uploaded to ECR.
aws ecr list-images --repository-name $simapp
aws ecr list-images --repository-name $robotapp
Expected Output:
Administrator:~/environment/helloworld (ros1) $ aws ecr list-images --repository-name $simapp
{
    "imageIds": [
        {
            "imageDigest": "sha256:28cad40230402343024kf303f30fk20f2f2fa0a8148",
            "imageTag": "latest"
        }
    ]
}
Administrator:~/environment/helloworld (ros1) $ aws ecr list-images --repository-name $robotapp
{
    "imageIds": [
        {
            "imageDigest": "sha256:28cad40230402343024kf303f30fk20f2f2fa0a8148",
            "imageTag": "latest"
        }
    ]
}
Congratulations! You have now pushed your ROS-based robot and simulation docker images to Amazon ECR.
Create and run robot and simulation applications with containers in AWS RoboMaker
In the final steps, we will create a new AWS RoboMaker simulation application and robot application referencing the respective Docker images in Amazon ECR. Ensure the environment variables from above are still set in your shell session.
Note: You can also run the below steps in the AWS Console, following the wizard. This way, resources such as the IAM role below will be automatically created for you. A similar example of this workflow is outlined in this blog.
- Create the robot application. For each command, save the ARN returned to use in the final step.
aws robomaker create-robot-application \ --name $robotapp \ --robot-software-suite name=General \ --environment uri=$ecruri/$robotapp:latest - Create the simulation application.
aws robomaker create-simulation-application \ --name $simapp \ --simulation-software-suite name=SimulationRuntime \ --robot-software-suite name=General \ --environment uri=$ecruri/$simapp:latest - Create a new file called
HelloWorldTrustPolicy.jsonand copy/paste the below JSON into the file:{ "Version": "2012-10-17", "Statement": [ { "Effect": "Allow", "Principal": { "Service": "robomaker.amazonaws.com" }, "Action": "sts:AssumeRole" } ] } - Create a new file called
HelloWorldPolicy.jsonand copy/paste the below IAM policy JSON into the file. Remember to replace<ACCOUNT_ID>and<REGION>with your account number and region{ "Version": "2012-10-17", "Statement": [ { "Effect": "Allow", "Action": [ "logs:CreateLogGroup", "logs:CreateLogStream", "logs:PutLogEvents", "logs:DescribeLogStreams" ], "Resource": "arn:aws:logs:<REGION>:<ACCOUNT_ID>:log-group:/aws/robomaker/SimulationJobs*" }, { "Effect": "Allow", "Action": [ "ecr:BatchGetImage", "ecr:GetAuthorizationToken", "ecr:BatchCheckLayerAvailability", "ecr:GetDownloadUrlForLayer" ], "Resource": [ "arn:aws:ecr:<REGION>:<ACCOUNT_ID>:repository/robomaker-helloworld-robot-app", "arn:aws:ecr:<REGION>:<ACCOUNT_ID>:repository/robomaker-helloworld-sim-app" ] }, { "Effect": "Allow", "Action": [ "ecr-public:GetAuthorizationToken", "ecr:GetAuthorizationToken" ], "Resource": "*" } ] } - Create a new IAM role with the policy above and save the IAM Role ARN from the output for the next step.
aws iam create-role --role-name RoboMaker-HelloWorld-Role --assume-role-policy-document file://HelloWorldTrustPolicy.json aws iam put-role-policy --role-name RoboMaker-HelloWorld-Role --policy-name RoboMaker-HelloWorld-InlinePolicy --policy-document file://HelloWorldPolicy.json - Create a new file called
create_simulation_job.jsonand copy/paste the below JSON into the file. Replace <IAM-ROLE-ARN>, <YOUR-ROBOT-APP-ARN> and <YOUR-SIM-APP-ARN> with the outputs of the commands above.{ "maxJobDurationInSeconds": 3600, "iamRole": "<IAM-ROLE-ARN>", "robotApplications": [ { "application": "<YOUR-ROBOT-APP-ARN>", "applicationVersion": "$LATEST", "launchConfig": { "environmentVariables": { "ROS_IP": "ROBOMAKER_ROBOT_APP_IP", "ROS_MASTER_URI": "http://ROBOMAKER_ROBOT_APP_IP:11311", "GAZEBO_MASTER_URI": "http://ROBOMAKER_SIM_APP_IP:11345" }, "streamUI": false, "command": [ "roslaunch", "hello_world_robot", "rotate.launch" ] }, "tools": [ { "streamUI": true, "name": "robot-terminal", "command": "/entrypoint.sh && xfce4-terminal", "streamOutputToCloudWatch": true, "exitBehavior": "RESTART" } ] } ], "simulationApplications": [ { "application": "<YOUR-SIM-APP-ARN>", "launchConfig": { "environmentVariables": { "ROS_IP": "ROBOMAKER_SIM_APP_IP", "ROS_MASTER_URI": "http://ROBOMAKER_ROBOT_APP_IP:11311", "GAZEBO_MASTER_URI": "http://ROBOMAKER_SIM_APP_IP:11345", "TURTLEBOT3_MODEL":"waffle_pi" }, "streamUI": true, "command": [ "roslaunch", "hello_world_simulation", "empty_world.launch" ] }, "tools": [ { "streamUI": true, "name": "gzclient", "command": "/entrypoint.sh && gzclient", "streamOutputToCloudWatch": true, "exitBehavior": "RESTART" } ] } ] } - Run the following AWS CLI command to start the simulation
aws robomaker create-simulation-job --cli-input-json file://create_simulation_job.json - Open the AWS RoboMaker Console. Under Simulation run, click Simulation jobs.
- You should see your simulation job either preparing or running. Click on the simulation job.

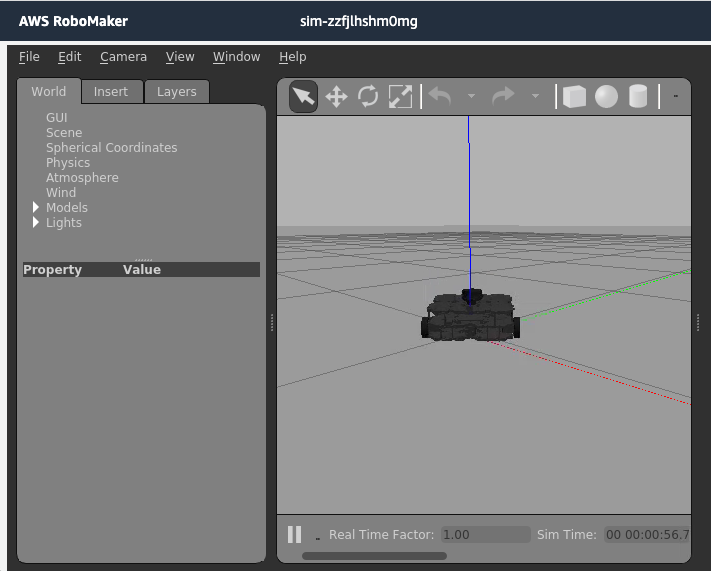
- Finally, click Connect on gzclient to see the simulation running.

- Click Actions, then Cancel to stop the simulation job once finished.
Congratulations! You can now build ROS applications, package them in Docker containers and run them using AWS RoboMaker.
Clean-up
Once complete, you can remove the resources you created with the following commands:
aws ecr delete-repository --repository-name $ecruri/$simapp
aws ecr delete-repository --repository-name $ecruri/$robotapp
aws robomaker delete-robot-application --application <ROBOT_APPLICATION_ARN>
aws robomaker delete-simulation-application --application <SIMULATION_APPLICATION_ARN>
aws iam delete-role --role-name RoboMaker-HelloWorld-Role
Summary
With this guide, you learned how to prepare ROS application Docker images for AWS RoboMaker. This approach is an alternative for using bundles and enables developers to customize the configuration of their containers and support a wide variety of different build tools, dependency management tools, and simulation engines.
We chose not to use bundles as the colcon build and install process with rosdep was sufficient when creating Docker images. However, colcon bundle is open source and available if you decide to continue using it with your robots. In this case, you can follow a similar approach outlined above to create Docker images for AWS RoboMaker. Simply remove the build stage, copy the bundle into the image and run the commands outlined in the bundle usage instructions.
We are excited to hear about the all of the different types of simulations ROS developers can now run with the new flexible container support.
Happy Building!