AWS Big Data Blog
Implement a CDC-based UPSERT in a data lake using Apache Iceberg and AWS Glue
May 2023: This post was reviewed and updated with code to read and write data to Iceberg table using Native iceberg connector, in the Appendix section.
As the implementation of data lakes and modern data architecture increases, customers’ expectations around its features also increase, which include ACID transaction, UPSERT, time travel, schema evolution, auto compaction, and many more. By default, Amazon Simple Storage Service (Amazon S3) objects are immutable, which means you can’t update records in your data lake because it supports append-only transactions. But there are use cases where you might be receiving incremental updates with change data capture (CDC) from your source systems, and you might need to update existing data in Amazon S3 to have a golden copy. Previously, you had to overwrite the complete S3 object or folders, but with the evolution of frameworks such as Apache Hudi, Apache Iceberg, Delta Lake, and governed tables in AWS Lake Formation, you can get database-like UPSERT features in Amazon S3.
Apache Hudi integration is already supported with AWS analytics services, and recently AWS Glue, Amazon EMR, and Amazon Athena announced support for Apache Iceberg. Apache Iceberg is an open table format originally developed at Netflix, which got open-sourced as an Apache project in 2018 and graduated from incubator mid-2020. It’s designed to support ACID transactions and UPSERT on petabyte-scale data lakes, and is getting popular because of its flexible SQL syntax for CDC-based MERGE, full schema evolution, and hidden partitioning features.
In this post, we walk you through a solution to implement CDC-based UPSERT or MERGE in an S3 data lake using Apache Iceberg and AWS Glue.
Configure Apache Iceberg with AWS Glue
You can integrate Apache Iceberg JARs into AWS Glue through its AWS Marketplace connector. The connector supports AWS Glue versions 1.0, 2.0, and 3.0, and is free to use. Configuring this connector is as easy as clicking few buttons on the user interface.
The following steps guide you through the setup process:
- Navigate to the AWS Marketplace connector page.
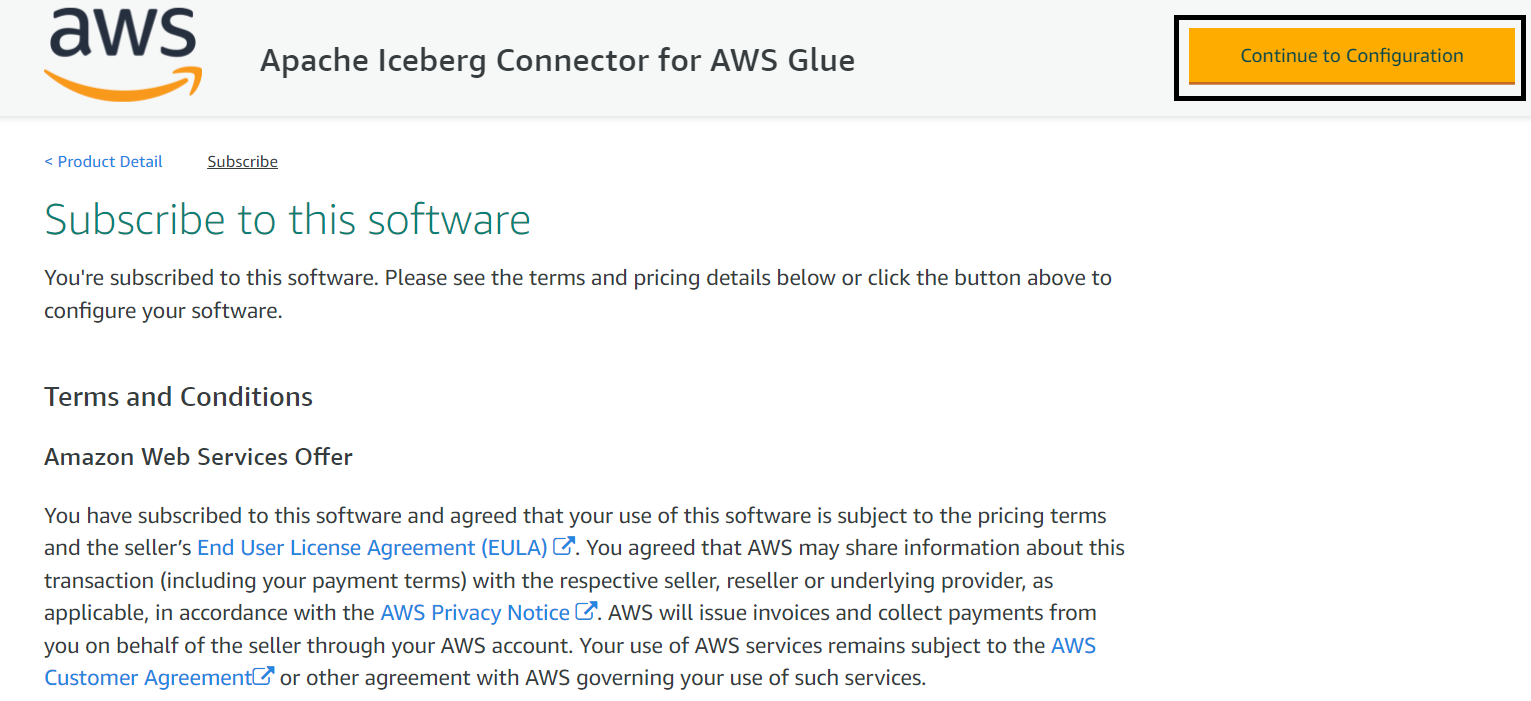
- Choose Continue to Subscribe and then Accept Terms.

- Choose Continue to Configuration.
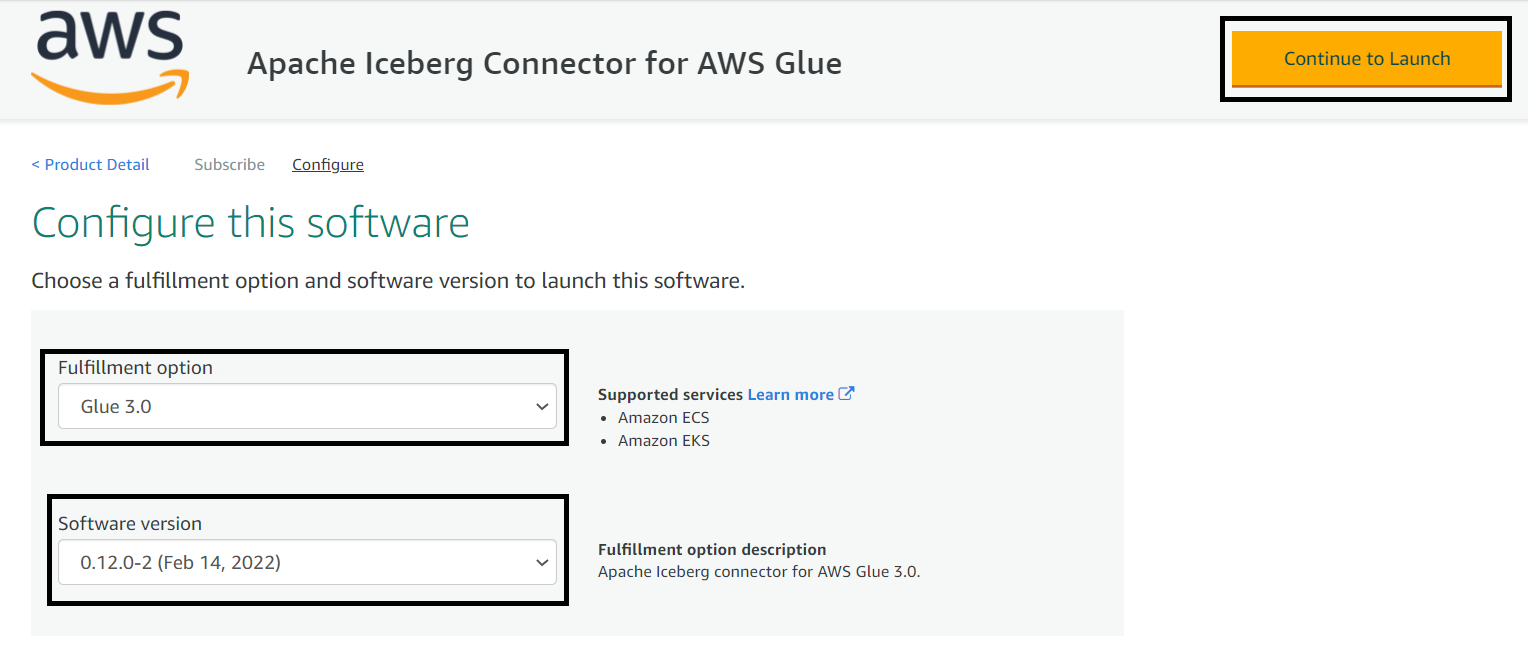
- Choose the AWS Glue version and software version.
- Choose Continue to Launch.
- Choose Usage Instruction, which opens a page that has a link to activate the connector.
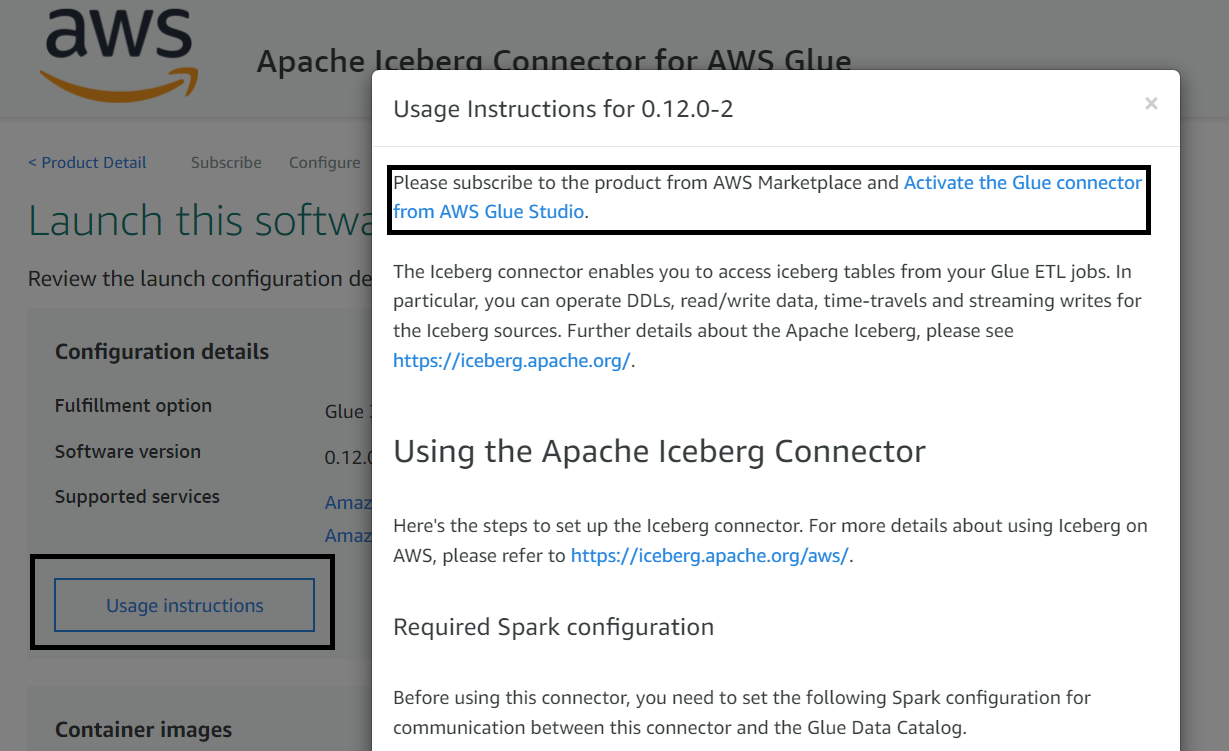
- Create a connection by providing a name and choosing Create connection and activate connector.

You can confirm your new connection on the AWS Glue Studio Connectors page.

To use this connector, when you create an AWS Glue job, make sure you add this connector to your job. Later in the implementation steps, when you create an AWS Glue job, we show how to use the connector you just configured.

Solution overview
Let’s assume you have a relational database that has product inventory data, and you want to move it into an S3 data lake on a continuous basis, so that your downstream applications or consumers can use it for analytics. After your initial data movement to Amazon S3, you’re supposed to receive incremental updates from the source database as CSV files using AWS DMS or equivalent tools, where each record has an additional column to represent an insert, update, or delete operation. While processing the incremental CDC data, one of the primary requirements you have is merging the CDC data in the data lake and providing the capability to query previous versions of the data.
To solve this use case, we present the following simple architecture that integrates Amazon S3 for the data lake, AWS Glue with the Apache Iceberg connector for ETL (extract, transform, and load), and Athena for querying the data using standard SQL. Athena helps in querying the latest product inventory data from the Iceberg table’s latest snapshot, and Iceberg’s time travel feature helps in identifying a product’s price at any previous date.
The following diagram illustrates the solution architecture.

The solution workflow consists of the following steps:
- Data ingestion:
- Steps 1.1 and 1.2 use AWS Database Migration Service (AWS DMS), which connects to the source database and moves incremental data (CDC) to Amazon S3 in CSV format.
- Steps 1.3 and 1.4 consist of the AWS Glue PySpark job, which reads incremental data from the S3 input bucket, performs deduplication of the records, and then invokes Apache Iceberg’s MERGE statements to merge the data with the target UPSERT S3 bucket.
- Data access:
- Steps 2.1 and 2.2 represent Athena integration to query data from the Iceberg table using standard SQL and validate the time travel feature of Iceberg.
- Data Catalog:
- The AWS Glue Data Catalog is treated as a centralized catalog, which is used by AWS Glue and Athena. An AWS Glue crawler is integrated on top of S3 buckets to automatically detect the schema.
We have referenced AWS DMS as part of the architecture, but while showcasing the solution steps, we assume that the AWS DMS output is already available in Amazon S3, and focus on processing the data using AWS Glue and Apache Iceberg.
To demo the implementation steps, we use sample product inventory data that has the following attributes:
- op – Represents the operation on the source record. This shows values
Ito represent insert operations,Uto represent updates, andDto represent deletes. You need to make sure this attribute is included in your CDC incremental data before it gets written to Amazon S3. AWS DMS enables you to include this attribute, but if you’re using other mechanisms to move data, make sure you capture this attribute, so that your ETL logic can take appropriate action while merging it. - product_id – This is the primary key column in the source database’s products table.
- category – This column represents the product’s category, such as
ElectronicsorCosmetics. - product_name – This is the name of the product.
- quantity_available – This is the quantity available in the inventory for a product. When we showcase the incremental data for UPSERT or MERGE, we reduce the quantity available for the product to showcase the functionality.
- last_update_time – This is the time when the product record was updated at the source database.
If you’re using AWS DMS to move data from your relational database to Amazon S3, then by default AWS DMS includes the op attribute for incremental CDC data, but it’s not included by default for the initial load. If you’re using CSV as your target file format, you can include IncludeOpForFullLoad as true in your S3 target endpoint setting of AWS DMS to have the op attribute included in your initial full load file. To learn more about the Amazon S3 settings in AWS DMS, refer to S3Settings.
To implement the solution, we create AWS resources such as an S3 bucket and an AWS Glue job, and integrate the Iceberg code for processing. Before we run the AWS Glue job, we have to upload the sample CSV files to the input bucket and process it with AWS Glue PySpark code for the output.
Prerequisites
Before getting started on the implementation, make sure you have the required permissions to perform the following in your AWS account:
- Create AWS Identity and Access Management (IAM) roles as needed
- Read or write to an S3 bucket
- Create and run AWS Glue crawlers and jobs
- Manage a database, table, and workgroups, and run queries in Athena
For this post, we use the us-east-1 Region, but you can integrate it in your preferred Region if the AWS services included in the architecture are available in that Region.
Now let’s dive into the implementation steps.
Create an S3 bucket for input and output
To create an S3 bucket, complete the following steps:
- On the Amazon S3 console, choose Buckets in the navigation pane.
- Choose Create bucket.
- Specify the bucket name as
glue-iceberg-demo, and leave the remaining fields as default.
S3 bucket names are globally unique. While implementing the solution, you may get an error saying the bucket name already exists. Make sure to provide a unique name and use the same name while implementing the rest of the implementation steps. Formatting the bucket name as<Bucket-Name>-${AWS_ACCOUNT_ID}-${AWS_REGION_CODE}might help you get a unique name. - Choose Create bucket.
- On the bucket details page, choose Create folder.
- Create two subfolders:
raw-csv-inputandiceberg-output.

- Upload the LOAD00000001.csv file into the
raw-csv-inputfolder of the bucket.

The following screenshot provides a sample of the input dataset.

Create input and output tables using Athena
To create input and output Iceberg tables in the AWS Glue Data Catalog, open the Athena console and run the following queries in sequence:
Alternatively, you can integrate an AWS Glue crawler on top of the input to create the table. Next, let’s create the AWS Glue PySpark job to process the input data.
Create the AWS Glue job
Complete the following steps to create an AWS Glue job:
- On the AWS Glue console, choose Jobs in the navigation pane.
- Choose Create job.
- Select Spark script editor.
- For Options, select Create a new script with boilerplate code.
- Choose Create.

- Replace the script with the following script:
- On the Job details tab, specify the job name.
- For IAM Role, assign an IAM role that has the required permissions to run an AWS Glue job and read and write to the S3 bucket.
- For Glue version, choose Glue 3.0.
- For Language, choose Python 3.

- Make sure Job bookmark has default value of Enable.
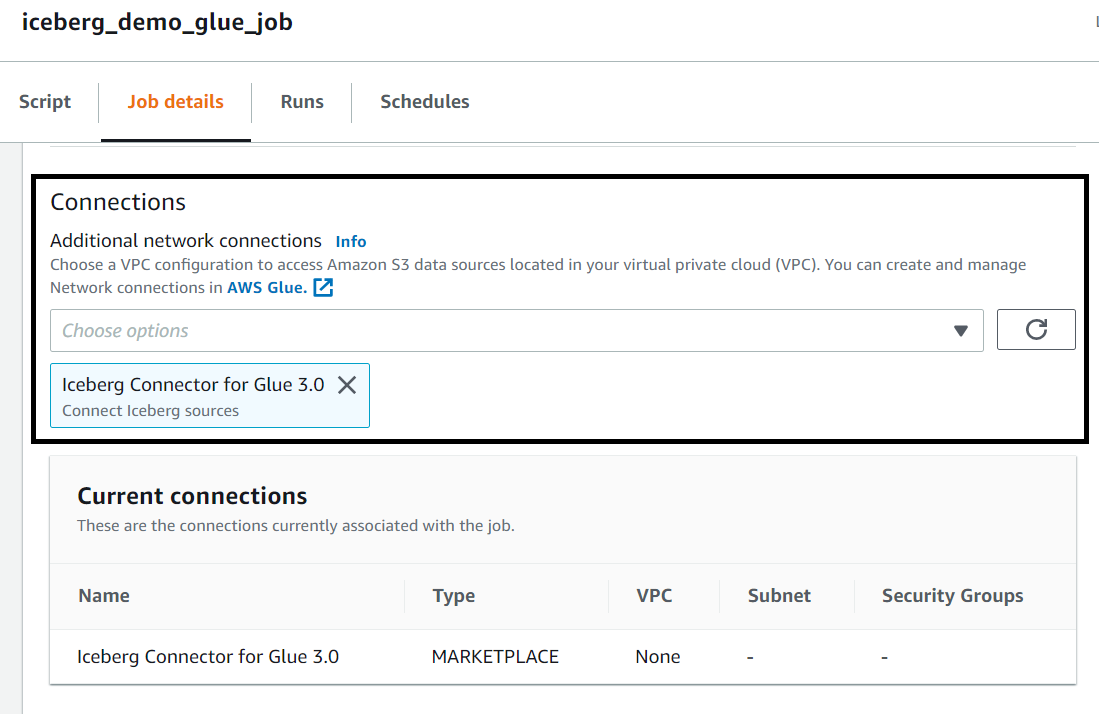
- Under Connections, choose the Iceberg connector.
- Under Job parameters, specify Key as
--iceberg_job_catalog_warehouseand Value as your S3 path (e.g.s3://<bucket-name>/<iceberg-warehouse-path>).

- Choose Save and then Run, which should write the input data to the Iceberg table with a MERGE statement.
Because the target table is empty in the first run, the Iceberg MERGE statement runs an INSERT statement for all records.
Query the Iceberg table using Athena
After you have successfully run the AWS Glue job, you can validate the output in Athena with the following SQL query:
The output of the query should match the input, with one difference: The Iceberg output table doesn’t have the op column.

Upload incremental (CDC) data for further processing
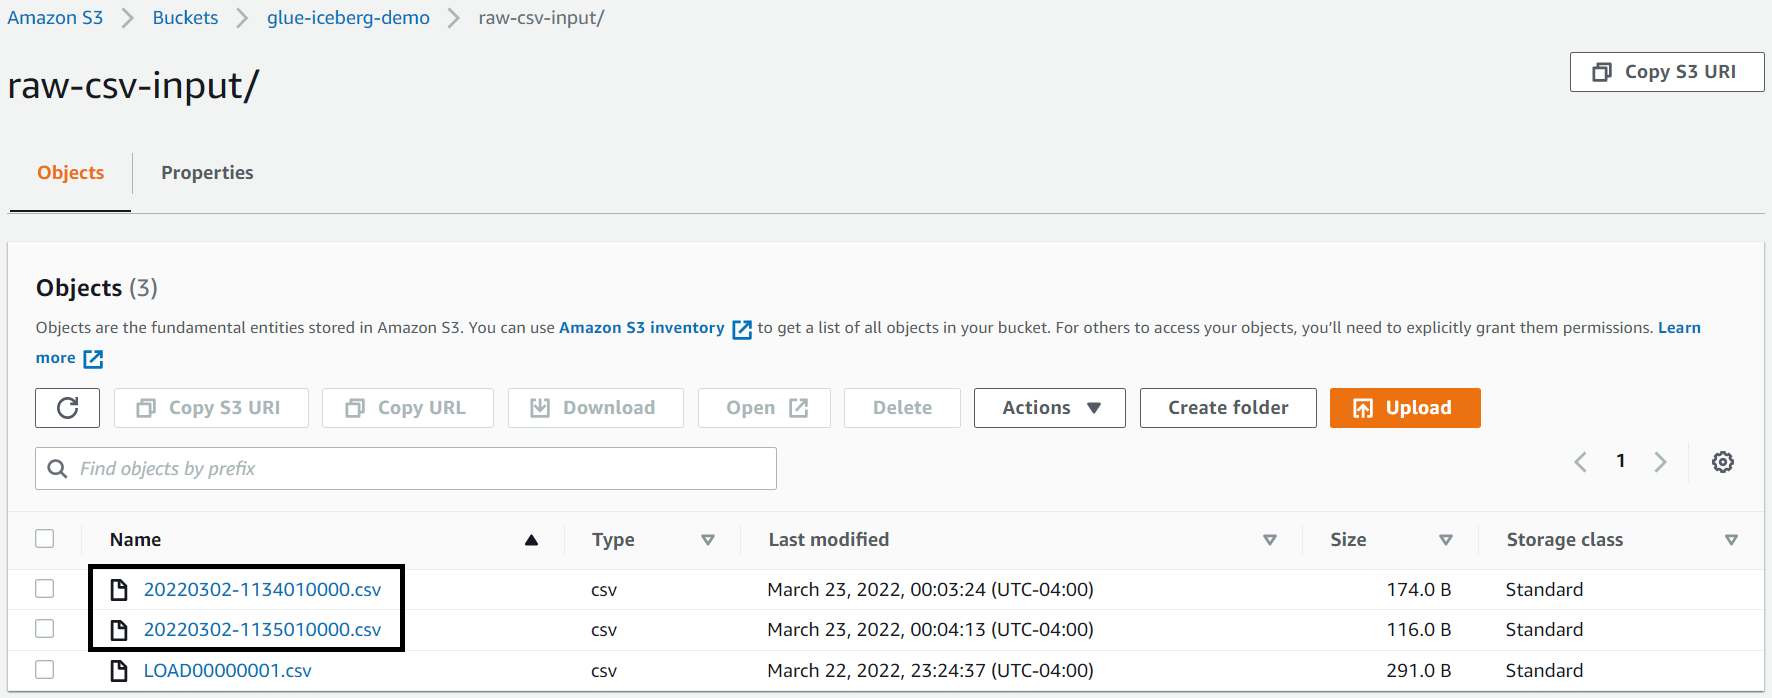
After we process the initial full load file, let’s upload the following two incremental files, which include insert, update, and delete records for a few products.
The following is a snapshot of first incremental file (20220302-1134010000.csv).

The following is a snapshot of the second incremental file (20220302-1135010000.csv), which shows that record 102 has another update transaction before the next ETL job processing.

After you upload both incremental files, you should see them in the S3 bucket.
Run the AWS Glue job again to process incremental files
Because we enabled bookmarks on the AWS Glue job, the next job picks up only the two new incremental files and performs a merge operation on the Iceberg table.
To run the job again, complete the following steps:
- On the AWS Glue console, choose Jobs in the navigation pane.
- Select the job and choose Run.
As explained earlier, the PySpark script is expected to deduplicate the input data before merging to the target Iceberg table, which means it only picks up the latest record of the 102 product.
For this post, we run the job manually, but you can configure your AWS Glue jobs to run as part of an AWS Glue workflow or via AWS Step Functions (for more information, see Manage AWS Glue Jobs with Step Functions).
Query the Iceberg table using Athena, after incremental data processing
After incremental data processing is complete, you can run the same SELECT statement again and validate that the quantity value is updated for record 102 and product record 103 is deleted.
The following screenshot shows the output.

Query the previous version of data with Iceberg’s time travel feature
You can run the following SQL query in Athena that uses the AS OF TIME statement of Iceberg to query the previous version of the data:
The following screenshot shows the output. As you can see, the quantity value of product ID 102 is 30, which was available during the initial load.

Note that you have to change the AS OF TIMESTAMP value based on your runtime.
This concludes the implementation steps.
Considerations
The following are a few considerations you should keep in mind while integrating Apache Iceberg with AWS Glue:
- Athena support for Iceberg became generally available recently, so make sure you review the considerations and limitations of using this feature.
- AWS Glue provides DynamicFrame APIs to read from different source systems and write to different targets. For this post, we integrated Spark DataFrame instead of AWS Glue DynamicFrame because Iceberg’s MERGE statements aren’t supported with AWS Glue DynamicFrame APIs.
To learn more about AWS integration, refer to Iceberg AWS Integrations.
Conclusion
This post explains how you can use the Apache Iceberg framework with AWS Glue to implement UPSERT on an S3 data lake. It provides an overview of Apache Iceberg, its features and integration approaches, and explains how you can implement it through a step-by-step guide.
I hope this gives you a great starting point for using Apache Iceberg with AWS analytics services and that you can build on top of it to implement your solution.
Appendix: AWS Glue DynamicFrame sample code to interact with Iceberg tables
- Read data from Iceberg table using Native iceberg connector:
Specify iceberg as a value for the --datalake-formats job parameter and add required configuration in conf section.
- Write data to Iceberg table using Native iceberg connector:
About the Author
 Sakti Mishra is a Principal Data Lab Solution Architect at AWS, where he helps customers modernize their data architecture and help define end to end data strategy including data security, accessibility, governance, and more. He is also the author of the book Simplify Big Data Analytics with Amazon EMR. Outside of work, Sakti enjoys learning new technologies, watching movies, and visiting places with family.