Front-End Web & Mobile

New: Announcing custom primary key support for AWS Amplify DataStore

Amplify DataStore provides frontend app developers the ability to build real-time apps with offline capabilities by storing data on-device (web browser or mobile device) and automatically synchronizing data to the cloud and across devices on an internet connection. Since its initial release, DataStore has been opinionated with regards to the handling of model identifiers – all models have by default an id field that is automatically populated on the client with a UUID v4. This opinionated stance has allowed DataStore to generate non-colliding (with a very small probability) globally unique identifiers in a scalable way. However, UUIDs are large, non-sequential, and opaque.

Today, we are introducing the release of custom primary keys, also known as custom identifiers, for Amplify DataStore to provide additional flexibility for your data models. For instance to:

  • Have friendly/readable identifiers (surrogate/opaque vs natural keys)
  • Define composite primary keys
  • Customize your data partitioning to optimize for scale
  • Selectively synchronize data to clients, e.g. by fields like deviceId, userId or similar
  • Prioritize the sort order in which objects are returned by the sync queries
  • Make existing data consumable and syncable by Amplify DataStore

What we’ll learn:

  • How to configure and deploy an AppSync API and GraphQL schema using Amplify CLI to use a custom primary key as the unique identifier for a given model, including the ability to define composite primary keys – keys that requires multiple fields
  • How you can create, read, update, and delete data using Amplify DataStore when working with custom primary keys

What we’ll build:

  • A React-based Movie Collection app with public read and write permissions
  • Users can delete records using custom primary and composite keys
GIF showing records queried by Custom Primary Key

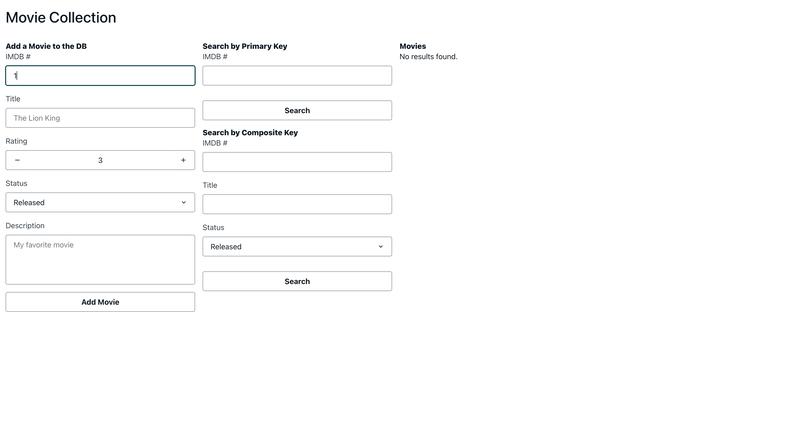
Figure 1 – GIF showing records queried by Custom Primary Key

Prerequisites

  • Install and configure the latest version of the Amplify CLI

Setup a new React Project

Run the following command to create a new Amplify project through Create-React-App called amplify-movies.

npx create-react-app@latest amplify-movies
cd amplify-movies

Setup your app backend with Amplify CLI

Run the following command to initialize an Amplify project with default values

amplify init -y

Once complete, your project is initialized and connected to the cloud backend. Let’s add a API category to your app using:

amplify add api

and choose from the following options:

? Select from one of the below mentioned services: GraphQL
? Here is the GraphQL API that we will create. Select a setting to edit or continue (Use arrow keys)
Name: amplifymovies

Enable Conflict Detection and select a Resolution Strategy

? Enable conflict detection? Yes
? Select the default resolution strategy Auto Merge
? Choose a schema template: Single object with fields (e.g., “Todo” with ID, name, description)
✔ Do you want to edit the schema now? (Y/n) · Y

Create Movie Schema with custom primary key

Edit the schema at amplify/backend/api/amplifymovies/schema.graphql

type Movie @model @auth(rules: [{ allow: public}]) {
  imdb: ID! @primaryKey
  title: String!
  status: MovieStatus!
  rating: Int!
  description: String
}

enum MovieStatus {
  UPCOMING
  RELEASED
}

You have a created a Movie model with a custom primary key of imdb using the @primaryKey directive. You have other fields for title, status, rating and description. Let us also define an enum called MovieStatus to hold the values for UPCOMING and RELEASED movies.

Note – Since we are using public as the authorization mode, we are adding the @auth directive to our Movie type, which uses an API Key to authorize graphql queries and mutations from our app. You can configure additional authorization rules as per your schema requirements here

Now that you have your schema setup, let’s deploy your app backend to create your GraphQL API. Run the following command:

amplify push
? Are you sure you want to continue? Yes
? Do you want to generate code for your newly created GraphQL API Yes
? Choose the code generation language target javascript
? Enter the file name pattern of graphql queries, mutations and subscriptions src/graphql/**/*.js
? Do you want to generate/update all possible GraphQL operations - queries, mutations and subscriptions Yes
? Enter maximum statement depth [increase from default if your schema is deeply nested] 2

Your app with Movie schema has been deployed successfully. Now let’s focus on client-side code.

Install and Initialize Amplify Libraries

Run the following command to install Amplify libraries and UI components:

npm install aws-amplify @aws-amplify/ui-react

To learn more about Amplify UI React components, visit Amplify UI Docs

In your index.js (src/index.js), initialize Amplify library by adding the following:

import { Amplify } from "aws-amplify";
import awsExports from "./aws-exports";

Amplify.configure(awsExports);

Setup your frontend UI code

The UI code consists of –

  • Form – A simple form to add movies into the DB
  • Search – Ability to search movies by custom primary key
  • Movie Card – Display collection of Movies through Card components

Let’s create a Movie Card component to display the movies added into your collection. Create a new folder under src/components

We will import Amplify UI components. For a visual description of the movie, let’s use movie posters. This is available via the omdbapi. Let’s pass the title info to the API which will return the corresponding poster of the movie.

For further information on the API, please visit OMDB API. Once you have your own API KEY, create a .env file in the root directory of your project and set it as the value of the environment variable REACT_APP_OMDB_API_KEY. You must restart your dev server after making changes to the .env file in order for the environment variables to be reflected in your application.

Create a new file called MovieCard.js and add the following code:

import React, { useEffect, useState } from "react";
import {
    Button,
    Card,
    Flex,
    Heading,
    Image,
    Rating,
    Text,
    useTheme,
  } from "@aws-amplify/ui-react";
  
  const MovieCard = ({ data, handleDelete }) => {
    const { imdb, title, rating, status, description } = data;
  
    const [posterUrl, setPosterUrl] = useState();
    const { tokens } = useTheme();
  
    const getPosterUrl = async () => {
      const response = await fetch(
        `http://www.omdbapi.com/?t=${title}&apikey=${process.env.REACT_APP_OMDB_API_KEY}`
      );
      const data = await response.json();
  
      setPosterUrl(data.Poster);
    };
  
    useEffect(() => {
      getPosterUrl();
    }, [title]);
  
    return (
      <Card borderRadius="medium" maxWidth="20rem" variation="outlined">
        <Flex direction="column" height="100%">
          <Image
            alt="Abstract art"
            height="21rem"
            src={posterUrl}
            width="100%"
            objectFit="initial"
          />
          <Text>imdb #: {imdb}</Text>
          <Heading level={4}>{title}</Heading>
          <Rating value={rating} />
          <Text>Status: {status}</Text>
          <Text flex="1 1 auto">Synopsis: {description}</Text>
  
          <Button
            backgroundColor={tokens.colors.brand.primary[60]}
            marginTop="1rem"
            variation="primary"
            onClick={handleDelete}
            isFullWidth
          >
            Delete
          </Button>
        </Flex>
      </Card>
    );
  };
  
  export default MovieCard;

Now, let’s build our App.js file. Replace the content of your App.js file with the following:

import React, { useEffect, useState } from "react";
import MovieCard from "./components/MovieCard";
import {
  Button,
  Flex,
  Heading,
  Text,
  TextField,
  SelectField,
  TextAreaField,
  Grid,
  Collection,
  View,
  StepperField,
} from "@aws-amplify/ui-react";
import { DataStore, Predicates } from "aws-amplify";
import { Movie } from "./models";

import "@aws-amplify/ui-react/styles.css";

const initialState = {
  imdb: "",
  title: "",
  status: "RELEASED",
  rating: 3,
  description: "",
};

export default function App() {
  const [input, setInput] = useState(initialState);
  const [primaryKey, setPrimaryKey] = useState("");
  const [movies, setMovies] = useState([]);

  const addMovie = async (e) => {
    e.preventDefault();
    const { imdb, title, status, rating, description } = input;

    await DataStore.save(
      new Movie({
        imdb,
        title,
        status,
        rating,
        description,
      })
    );

    setInput(initialState);
  };

  const handleChange = (e) => {
    setInput((prevInput) => ({
      ...prevInput,
      [e.target.name]: e.target.value,
    }));
  };

  const getMovieByCPK = async (e) => {
    e.preventDefault();

    const movie = await DataStore.query(Movie, primaryKey);

    movie ? setMovies([movie]) : setMovies([]);
  };

  const deleteByCPK = async (imdb) => {
    await DataStore.delete(Movie, imdb);
  };

  useEffect(() => {
    const subscription = DataStore.observeQuery(Movie).subscribe({
      next: ({ items, isSynced }) => {
        if (isSynced) setMovies(items);
      },
      complete: () => console.log("complete"),
      error: (err) => console.log(err),
    });

    return () => {
      subscription.unsubscribe();
    };
  }, []);

  return (
    <View padding="1rem">
      <Heading level={3}>Movie Collection</Heading>

      <Grid
        templateColumns={{ base: "1fr 1fr", xl: "1fr 1fr 2fr" }}
        templateRows="1fr"
        gap="1rem"
        marginTop="2rem"
      >
        <form onSubmit={addMovie}>
          <Heading>Add a Movie to the DB</Heading>
          <Grid templateRows="1fr" rowGap="1rem">
            <TextField
              name="imdb"
              placeholder="tt12345"
              label="IMDB Number"
              errorMessage="There is an error"
              value={input.imdb}
              onChange={handleChange}
              isRequired
            />
            <TextField
              name="title"
              placeholder="The Lion King"
              label="Title"
              errorMessage="There is an error"
              value={input.title}
              onChange={handleChange}
              isRequired
            />
            <StepperField
              defaultValue={3}
              min={1}
              max={5}
              step={1}
              label="Rating"
              errorMessage="There is an error"
              value={input.rating}
              onStepChange={(value) =>
                setInput((prev) => ({ ...prev, rating: value }))
              }
              isRequired
            />
            <SelectField
              name="status"
              label="Status"
              value={input.status}
              onChange={handleChange}
            >
              <option value="RELEASED">Released</option>
              <option value="UPCOMING">Upcoming</option>
            </SelectField>
            <TextAreaField
              name="description"
              placeholder="My favorite movie"
              label="Description"
              errorMessage="There is an error"
              value={input.description}
              onChange={handleChange}
            />
            <Button type="submit">Add Movie</Button>
          </Grid>
        </form>

        <View>
          <form onSubmit={getMovieByCPK}>
            <Heading>Search by Primary Key</Heading>
            <Grid templateRows="1fr" rowGap="1rem">
              <TextField
                label="Search By IMDB #"
                onChange={(e) => {
                  setPrimaryKey(e.currentTarget.value);
                }}
              />
              <Button marginTop="1rem" type="submit">
                Search
              </Button>
            </Grid>
          </form>
        </View>

        <View>
          <Heading>Movies</Heading>
          {movies.length ? (
            <Collection
              items={movies}
              type="grid"
              columnGap="0.5rem"
              rowGap="0.5rem"
              templateColumns="1fr 1fr 1fr"
              templateRows="1fr"
              marginTop="1rem"
            >
              {(item) => {
                return (
                  <MovieCard
                    key={item.imdb}
                    data={item}
                    handleDelete={() => deleteByCPK(item.imdb)}
                  />
                );
              }}
            </Collection>
          ) : (
            <Text>No results found.</Text>
          )}
        </View>
      </Grid>
    </View>
  );
}

Test your app on your local machine by running:

npm run start

This serves an app where you can add Movies using a Custom Primary Key which, for the purpose of demonstration, we’ll name imdb. You will also be able to see the movies you add and search for a specific movie using the Custom Primary Key.

Creating Records with Custom Primary Key

GIF showing creating records with Custom Primary Key

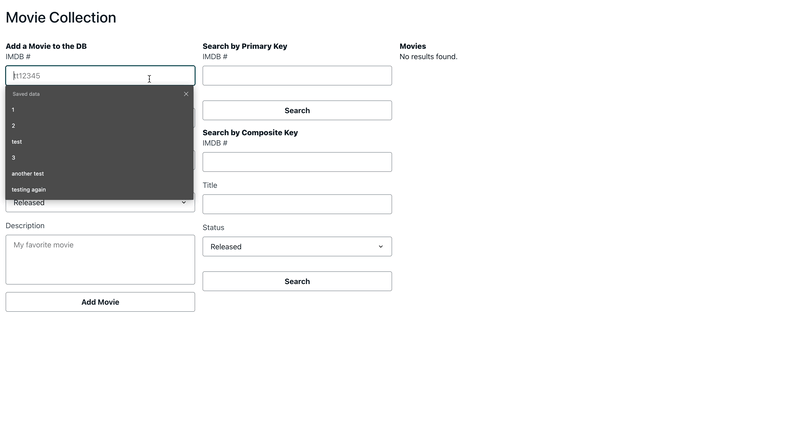
Figure 2 – GIF showing creating records with Custom Primary Key


const movie = await DataStore.save(new Movie({ 
imdb: "1", 
title: "The Dark Knight", 
status "RELEASED", 
rating: 5
}));

When creating a record with a custom primary key, we can specify the value for the primary key imdb instead of DataStore auto-generating a unique id for each new record.

Querying Records by Custom Primary Key

GIF showing query by custom primary key

Figure 3 – GIF showing query by custom primary key

const movie = await DataStore.query(Movie, "1");

This query will behave the same as having an auto-generated id field in our schema, except now each record’s imdb number is treated as the unique identifier of the record and DataStore will use it to retrieve and return a single matching record.

Deleting Records by Custom Primary Key

Deleting records with a custom primary key behaves the same as deleting a record with an auto-generated id.

const deletedMovie = await DataStore.delete(Movie, "1");

Update Schema with a Composite Key

Now that we have experience with using Custom Primary Key and building your favorite Movie collection app, let’s add a model with a composite key to your schema.

Edit your amplify/backend/api/amplifymovies/schema.graphql to make the below changes:

type Movie @model @auth(rules: [{allow: public}]) {
  imdb: ID! @primaryKey
  title: String!
  status: MovieStatus!
  rating: Int!
  description: String
}

type MovieComposite @model @auth(rules: [{allow: public}]) {
  imdb: ID! @primaryKey(sortKeyFields: ["title", "status"])
  title: String!
  status: MovieStatus!
  rating: Int!
  description: String
}

enum MovieStatus {
  UPCOMING
  RELEASED
}

Note – We are creating a new Model because you cannot update a Primary Key once created and deployed. This will result in an error when you run amplify push.

For the purposes of demonstrating the differences in accessing data with composite keys with DataStore, we are defining a new Model called MovieComposite, with a composite key made up of a record’s imdb, title and status fields.

Run the following command to deploy your schema changes to the backend:

amplify push

Now, let’s build our App.js file. Replace the content of your App.js file with the following:

import React, { useEffect, useState } from "react";
import MovieCard from "./components/MovieCard";
import {
  Button,
  Heading,
  Text,
  TextField,
  SelectField,
  TextAreaField,
  Grid,
  Collection,
  View,
  StepperField,
} from "@aws-amplify/ui-react";
import { DataStore } from "aws-amplify";
import { MovieComposite } from "./models";

import "@aws-amplify/ui-react/styles.css";
import "./App.css";

const initialState = {
  imdb: "",
  title: "",
  status: "RELEASED",
  rating: 3,
  description: "",
};

export default function App() {
  const [input, setInput] = useState(initialState);
  const [primaryKey, setPrimaryKey] = useState("");
  const [compositeKey, setCompositeKey] = useState({
    imdb: "",
    title: "",
    status: "RELEASED",
  });
  const [movies, setMovies] = useState([]);

  const addMovie = async (e) => {
    e.preventDefault();

    await DataStore.save(new MovieComposite(input));

    setInput(initialState);
  };

  const handleChange = (e) => {
    setInput((prevInput) => ({
      ...prevInput,
      [e.target.name]: e.target.value,
    }));
  };

  const getMovieByPrimaryKey = async (e) => {
    e.preventDefault();

    const movies = await DataStore.query(MovieComposite, (m) =>
      m.imdb.eq(primaryKey)
    );

    setMovies(movies);
  };

  const getMovieByCompositeKey = async (e) => {
    e.preventDefault();

    const movie = await DataStore.query(MovieComposite, m => m.and(m => [
      m.imdb.eq(compositeKey.imdb),
      m.title.eq(compositeKey.title),
      m.status.eq(compositeKey.status)
   ]));

    movie ? setMovies(movie) : setMovies([]);
  };

  const deleteByCompositeKey = async ({ imdb, title, status }) => {
    await DataStore.delete(MovieComposite, m => m.and(m => [
      m.imdb.eq(imdb),
      m.title.eq(title),
      m.status.eq(status)
   ]));
  };

  useEffect(() => {
    const subscription = DataStore.observeQuery(MovieComposite).subscribe({
      next: ({ items, isSynced }) => {
        if (isSynced) setMovies(items);
      },
      complete: () => console.log("complete"),
      error: (err) => console.log(err),
    });

    return () => {
      subscription.unsubscribe();
    };
  }, []);

  return (
    <View padding="1rem">
      <Heading level={3}>Movie Collection</Heading>

      <Grid
        templateColumns={{ base: "1fr 1fr", xl: "1fr 1fr 2fr" }}
        templateRows="1fr"
        gap="1rem"
        marginTop="2rem"
      >
        <form onSubmit={addMovie}>
          <Heading>Add a Movie to the DB</Heading>
          <Grid templateRows="1fr" rowGap="1rem">
            <TextField
              name="imdb"
              placeholder="tt12345"
              label="IMDB #"
              errorMessage="There is an error"
              value={input.imdb}
              isRequired
              onChange={handleChange}
            />
            <TextField
              name="title"
              placeholder="The Lion King"
              label="Title"
              errorMessage="There is an error"
              value={input.title}
              isRequired
              onChange={handleChange}
            />
            <StepperField
              defaultValue={3}
              min={1}
              max={5}
              step={1}
              label="Rating"
              errorMessage="There is an error"
              value={input.rating}
              isRequired
              onStepChange={(value) =>
                setInput((prev) => ({ ...prev, rating: value }))
              }
            />
            <SelectField
              name="status"
              label="Status"
              value={input.status}
              isRequired
              onChange={handleChange}
            >
              <option value="RELEASED">Released</option>
              <option value="UPCOMING">Upcoming</option>
            </SelectField>
            <TextAreaField
              name="description"
              placeholder="My favorite movie"
              label="Description"
              errorMessage="There is an error"
              value={input.description}
              onChange={handleChange}
            />
            <Button type="submit">Add Movie</Button>
          </Grid>
        </form>

        <View>
          <form onSubmit={getMovieByPrimaryKey}>
            <Heading>Search by Primary Key</Heading>
            <Grid templateRows="1fr" rowGap="1rem">
              <TextField
                label="IMDB #"
                onChange={(e) => {
                  setPrimaryKey(e.currentTarget.value);
                }}
              />
              <Button marginTop="1rem" type="submit">
                Search
              </Button>
            </Grid>
          </form>

          <form style={{ marginTop: "1rem" }} onSubmit={getMovieByCompositeKey}>
            <Heading>Search by Composite Key</Heading>
            <Grid templateRows="1fr" rowGap="1rem">
              <TextField
                label="IMDB #"
                name="imdb"
                isRequired
                onChange={(e) => {
                  setCompositeKey((prev) => ({
                    ...prev,
                    imdb: e.target.value,
                  }));
                }}
              />
              <TextField
                label="Title"
                name="title"
                isRequired
                onChange={(e) => {
                  setCompositeKey((prev) => ({
                    ...prev,
                    title: e.target.value,
                  }));
                }}
              />
              <SelectField
                label="Status"
                name="status"
                isRequired
                onChange={(e) =>
                  setCompositeKey((prev) => ({
                    ...prev,
                    status: e.target.value,
                  }))
                }
              >
                <option value="RELEASED">Released</option>
                <option value="UPCOMING">Upcoming</option>
              </SelectField>
              <Button marginTop="1rem" type="submit">
                Search
              </Button>
            </Grid>
          </form>
        </View>

        <View>
          <Heading>Movies</Heading>
          {movies.length ? (
            <Collection
              items={movies}
              type="grid"
              columnGap="0.5rem"
              rowGap="0.5rem"
              templateColumns="1fr 1fr 1fr"
              templateRows="1fr"
              marginTop="1rem"
            >
              {(item) => {
                return (
                  <MovieCard
                    key={item.imdb + item.title + item.status}
                    data={item}
                    handleDelete={() => deleteByCompositeKey(item)}
                  />
                );
              }}
            </Collection>
          ) : (
            <Text>No results found.</Text>
          )}
        </View>
      </Grid>
    </View>
  );
}

Test your app on your local machine by running:

npm start

Creating a record is the same between a model with a custom primary key and a model with a composite key. So, we’re going to focus on the differences when querying.

Querying for a single record by Composite Key

GIF showing querying a single record by Composite Key

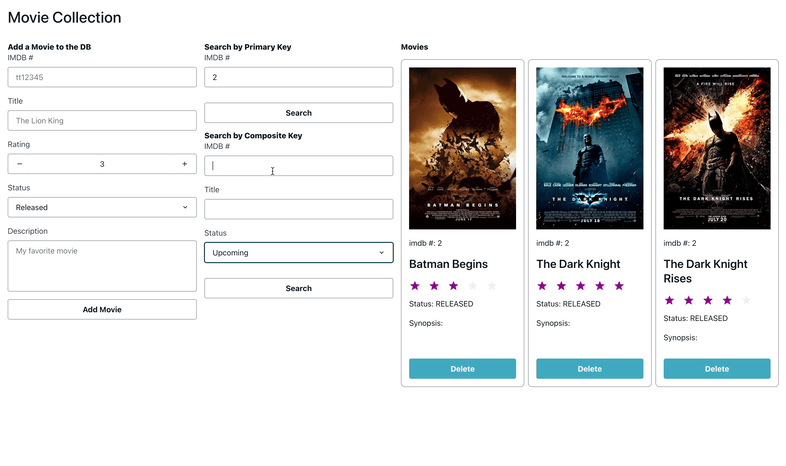
Figure 4 – GIF showing querying a single record by Composite Key

In our code that demonstrated using a custom primary key, we had to create Movie records with unique imdb numbers and were able to query those records specifically as such. With a composite key we are able to create records with the same primary key value. While we can still query by primary key, we cannot reliably retrieve a particular record if more than one record share the same primary key value. For example, given this dataset:

Image showing a sample dataset for movies

Figure 5 – Image showing a sample dataset for movies

Say we want to retrieve the record with a title of “The Dark Knight”. If we use the same syntax we did when our schema only had a custom primary key and no sort keys, DataStore will throw an error. Instead, we must use a composite key to ensure that we are being specific enough about the record we want. So, in addition to the imdb number, we must also specify both the title and status. This can be done either using an object literal or predicate syntax.

Query

// (Object Literal Syntax)
DataStore.query(MovieComposite, {
    imdb: "1",
    title: "The Dark Knight",
    status: "RELEASED"
});

OR


// (Predicates Syntax)
DataStore.query(MovieComposite, m => m.and([
   m.imdb.eq("1"),
   m.title.eq("The Dark Knight"),
   m.status.eq("RELEASED")
]));
	
Image showing the result of DataStore query in a table

Figure 6 – Image showing the result of DataStore query in a table

Querying for multiple records by Primary Key

GIF showing query of multiple records by Custom Primary Key

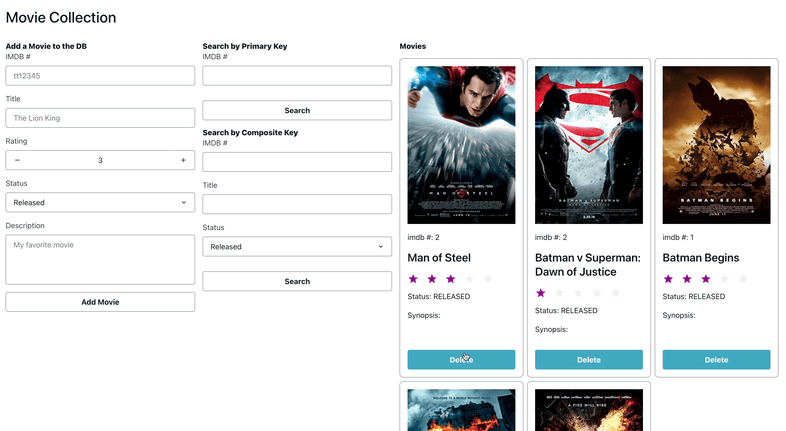
Figure 7 – GIF showing query of multiple records by Custom Primary Key

With a model that uses a composite key, we can create multiple records with the same primary key value. Let’s say we wanted to query for all records that share the same imdb number. In order to do so, we must use a predicate so that DataStore returns an array of all matching records rather than the first inserted.

Given the same dataset, we can retrieve all records with an imdb number of 1 like so:

Query


DataStore.query(MovieComposite, (m) =>
      m.imdb.eq("1")
    );

Result

Image showing results of query for multiple records by Custom Primary Key

Figure 8 – Image showing results of query for multiple records by Custom Primary Key

Deleting records by Composite Key

The behavior for deleting records is a bit different between a model with a primary key and one with a composite key. In our app code, we are deleting a single record by passing in a given record’s imdb, title, and status fields which, together, make up the composite key and uniquely identify the record we want to delete.


const deleteByCompositeKey = async ({ imdb, title, status }) => {
    await DataStore.delete(MovieComposite, { imdb, title, status });
};

When a model uses composite keys, we’re able to delete all records with the same imdb number, or primary key, by using a predicate.


DataStore.delete(MovieComposite, m => m.imdb.eq("1"));

Conclusion

In this post, we have a full-fledged Movie Collection App making use of both Custom Primary Keys and Composite Keys. If you would like to learn more about Advanced Workflows with Amplify DataStore, please visit:

Clean Up

Now that you have successfully deployed the app and tested the new features of Amplify DataStore using Custom Primary Keys, you can run the following command to delete the backend resources to avoid incurring costs:


amplify delete

About the authors:

Chris Bonifacio

Chris Bonifacio is a Developer Experience Engineer on the AWS Amplify Team. Chris works across several teams with a focus on JS and Data, and triages issues to ensure that bugs are identified, prioritized, and fixed accordingly. He also provides code-based and architectural solutions to developers building scalable applications with the Amplify JS libraries. In his free time Chris enjoys playing guitar, piano, and watching artsy films.

René Brandel

René Brandel is the Principal Product Manager for AWS Amplify. René works across Amplify Data and Studio to enhance customer experience through product innovation.

Arundeep Nagaraj

Arundeep (Arun) is a Developer Experience Manager for AWS Amplify working on resolving problems and architecture challenges for front-end developers. You can follow Arun on Twitter at @arun_deepn