AWS Big Data Blog
Writing to Apache Hudi tables using AWS Glue Custom Connector
December 2022: This post was reviewed for accuracy.
In today’s world, most organizations have to tackle the 3 V’s of variety, volume and velocity of big data. In this blog post, we talk about dealing with the variety and volume aspects of big data. The challenge of dealing with the variety involves processing data from various SQL and NoSQL systems. This variety can include data from rdbms sources such as Amazon Aurora or NoSQL sources such as Amazon DynamoDB or 3rd party APIs.
AWS Glue is a serverless data integration service that makes it easy to discover, prepare, and combine data for analytics, machine learning, and application development. In order to enable customers process data from a variety of sources, the AWS Glue team has introuduced AWS Glue Custom Connectors, a new capability in AWS Glue and AWS Glue Studio that makes it easy for you to transfer data from SaaS applications and custom data sources to your data lake in Amazon S3. With just a few clicks, you can search and select connectors from the AWS Marketplace and begin your data preparation workflow in minutes. This new feature is over and above the AWS Glue Connections feature in the AWS Glue service.
In this post, we simplify the process to create Hudi tables with AWS Glue Custom Connector. The jar wrapped by the first version of AWS Glue Custom Connector is based on Apache Hudi 0.5.3. Instructions on creating the JAR file are in the previous post of this series.
Whereas the first post focused on creating an end-to-end architecture for replicating the data in a rdbms source to Lakehouse, this post focuses on volume aspect of big data. In this post, we create a Hudi table with an initial load of over 200 million records and then update 70 million of those records. The connector not only writes the data to Amazon Simple Storage Service (Amazon S3), but also creates the tables in the AWS Glue Data Catalog. If you’re creating a partitioned Hudi table, the connector also creates the partitions in the Data Catalog. We discuss the code for creating a partitioned Hudi table in the previous post in this series.
We use the Copy On Write storage type, which gives better read performance compared to Merge On Read. For more information about Hudi storage types, see Hudi Dataset Storage Types and Storage Types & Views.
Note that this post focuses on using the AWS Glue Custom Connector to write to Apache Hudi tables. Please implement other best practices such as encryption and network security while implementing the architecture for your workloads.
Creating the Apache Hudi connection using AWS Glue Custom Connector
To create your AWS Glue job with an AWS Glue Custom Connector, complete the following steps:
- Go to the AWS Glue Studio Console, search for AWS Glue Connector for Apache Hudi and choose AWS Glue Connector for Apache Hudi link.

- Choose Continue to Subscribe.

- Review the Terms and Conditions and choose the Accept Terms button to continue.

- Make sure that the subscription is complete and you see the Effective date populated next to the product and then choose Continue to Configuration button.

- As of writing this blog, 0.5.3 is the latest version of the AWS Glue Connector for Apache Hudi. Make sure that 0.5.3 (Nov 19, 2020) is selected in the Software Version dropdown and Activate in AWS Glue Studio is selected in the Delivery Method dropdown. Choose Continue to Launch button.

- Under Launch this software, choose Usage Instructions and then choose Activate the Glue connector for Apache Hudi in AWS Glue Studio.

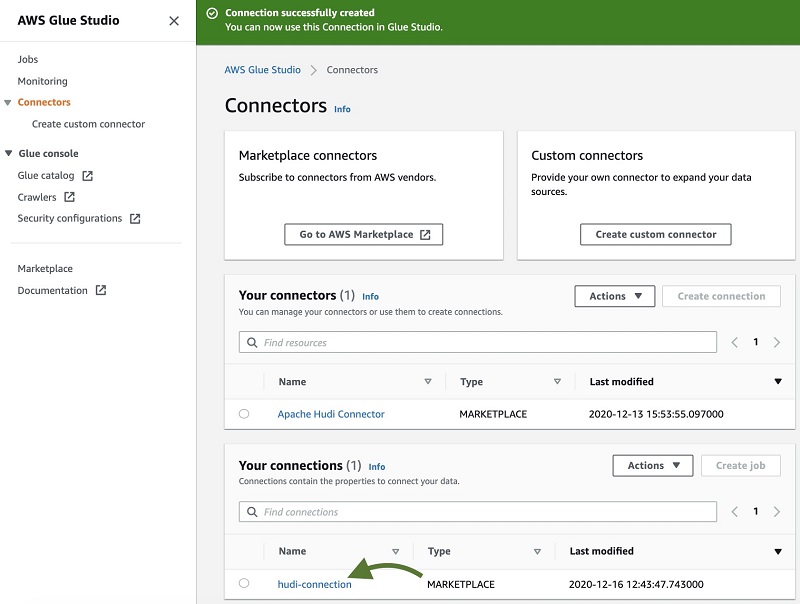
You’re redirected to AWS Glue Studio.
- For Name, enter a name for your connection (for example,
hudi-connection). - For Description, enter a description.

- Choose Create connection and activate connector.
A message appears that the connection was successfully created, and the connection is now visible on the AWS Glue Studio console.
Configuring resources and permissions
For this post, we provide an AWS CloudFormation template to create the following resources:
- Two AWS Glue jobs:
hudi-init-load-jobandhudi-upsert-job - An S3 bucket to store the Python scripts for these jobs
- An S3 bucket to store the output files of these jobs
- An AWS Lambda function to copy the scripts from the public S3 bucket to your account
- AWS Identity and Access Management (IAM) roles and policies with appropriate permissions
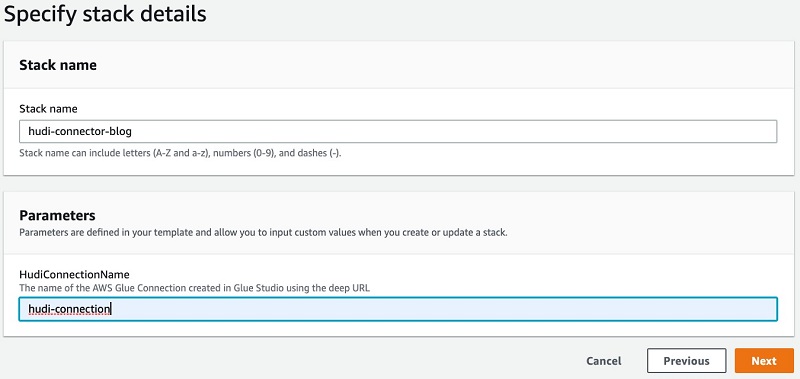
Launch the following stack, providing your connection name, created in Step 9 of the previous section, for the HudiConnectionName parameter:
![]()
Please check I acknowledge that AWS CloudFormation might create IAM resources with custom names check box before clicking the Create Stack button.
If you have AWS Lake Formation enabled in the Region in which you’re implementing this solution, make sure that you give HudiConnectorExecuteGlueHudiJobRole Create table permission in the default database. HudiConnectorExecuteGlueHudiJobRole is created by the CloudFormation stack that you created above.
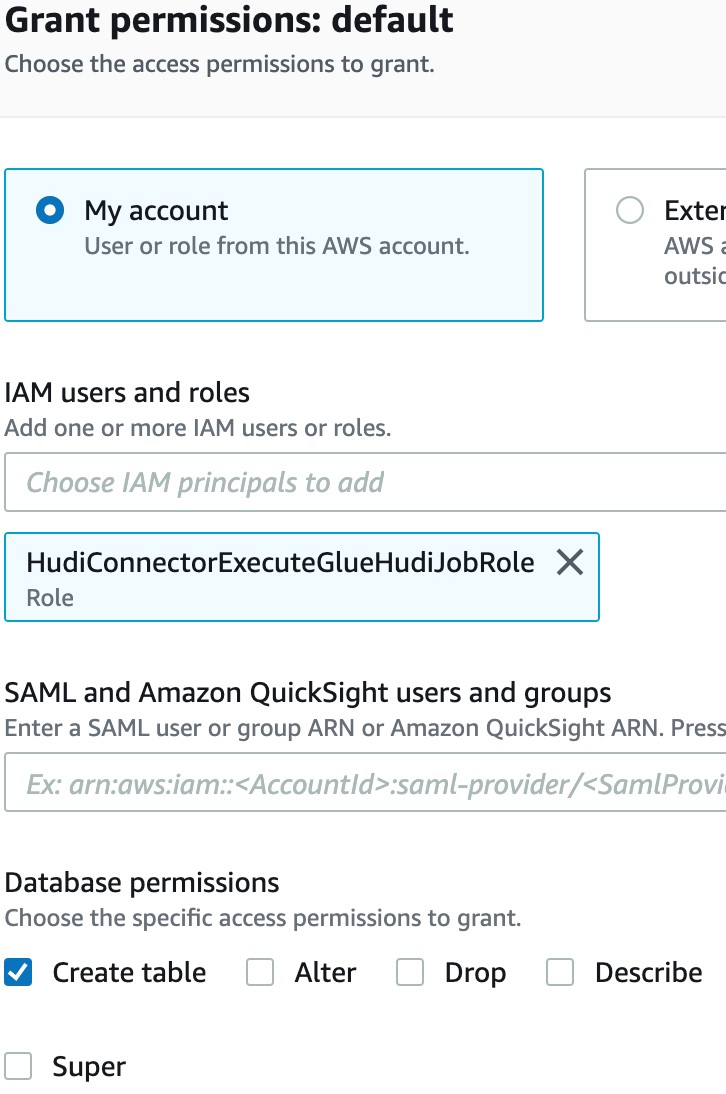
HudiConnectorExecuteGlueHudiJobRole should also have Create Database permission. You can grant this permission in Database creators section under Admins and database creators tab.

Running the load job
You’re now ready to run the first of your two jobs.
- On the AWS Glue console, select the job
hudi-init-load-job. - On the Action menu, choose Run job.

My job finished in less than 10 minutes. The job inserted over 204 million records into the Hudi table.

Although rest of the code is standard Hudi PySpark code, I want to call out the last line of the code to show how easy it is to write to Hudi tables using AWS Glue:
In the preceding code, combinedConf is a Python dictionary that includes all your Apache Hudi configurations. You can download the HudiInitLoadNYTaxiData.py script to use.
Querying the data
The ny_yellow_trip_data table is now visible in the default database, and you can query it through Athena.
If you have Lake Formation enabled in this Region, the role or user querying the table should have Select permissions on the table.
You can now run the following query:
The following screenshot shows our output.

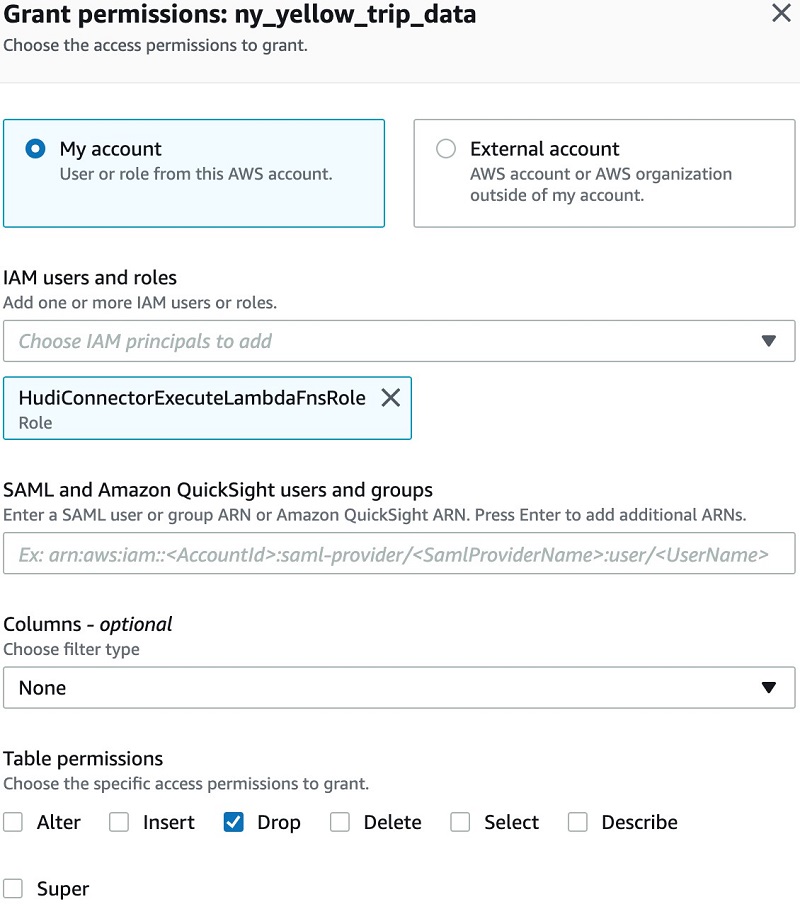
If you have Lake Formation enabled in this Region, make sure that you give Drop permission to HudiConnectorExecuteLambdaFnsRole so the CloudFormation template can drop the default.ny_yellow_trip_data table when you delete the stack.
Running the upsert job
You can now run your second job, hudi-upsert-job. This job reads the newly written data and updates the vendor IDs of all the records that have vendorid=1. The new vendor ID for these records (over 78 million) is set as 9. You can download the HudiUpsertNYTaxiData.py script to use.
This job also finished in under 10 minutes.

Querying the updated data
You can now query the updated Hudi table in Athena. The following screenshot shows that the vendor ID of over 78 million records has been changed to 9.

Additional considerations
The AWS Glue Connector for Apache Hudi has not been tested for AWS Glue streaming jobs. Additionally, there are some hardcoded Hudi options in the AWS Glue job scripts. These options are set for the sample table that we create for this post. Update the options based on your workload.
Conclusion
In this post, we created an Apache Hudi table with AWS Glue Custom Connector and AWS Glue 2.0 jobs. We read over 200 million records from a public S3 bucket and created an Apache Hudi table using it. We then updated over 70 million of these records. With the new AWS Glue Custom Connector feature, we can now directly write an AWS Glue DynamicFrame to an Apache Hudi table.
Note that you can also use Glue jobs to write to Apache Hudi MoR tables. Creating a source to Lakehouse data replication pipe using Apache Hudi, AWS Glue, AWS DMS, and Amazon Redshift talks about the process in detail. While it uses jars as an external dependency, you can now use the AWS Glue Connector for Apache Hudi for the same operation. The post uses HudiJob.py to write to MoR tables and then uses HudiMoRCompactionJob.scala to compact the MoR tables. Note that HudiMoRCompactionJob.scala has also been implemented using Glue jobs and hence you can use AWS Glue for compaction job too.
About the Author
 Vishal Pathak is a Data Lab Solutions Architect at AWS. Vishal works with the customers on their use cases, architects a solution to solve their business problems and helps the customers build an scalable prototype. Prior to his journey in AWS, Vishal helped customers implement BI, DW and DataLake projects in US and Australia.