AWS Compute Blog
Launching a WordPress Website using Amazon Lightsail Containers
This post is written by Benjamin Gardiner, Partner Solutions Architect.
Amazon Lightsail is a great way to get familiar with AWS. Lightsail simplifies the deployment of instances, databases, load balancers, CDNs, and now also containers. In this post I demonstrate how easy it is to launch a WordPress website using Lightsail containers and a Lightsail database. I’ll only use the Lightsail console, so no coding is required to follow along.
Product overview
Containers offer several advantages over virtual machines. For example, containers require less system resources than virtual machines and are lightweight, which allows you to quickly deploy and scale them. They can also be easily deployed on different operating systems, allowing for easier application development.
Containers can still be too complex, especially for those with limited cloud experience or those running only a few containers. They can bring a large amount of overhead with them. Tools such as Amazon Elastic Container Service (Amazon ECS) and Amazon Elastic Kubernetes Service (Amazon EKS) have made it easier to orchestrate, manage, and operate your containers. However, they might not be the best solution for you if you are running only a few containers.
Lightsail containers offers a solution here. The benefit of Lightsail is the ease of use. Under the hood, Lightsail is powered by Amazon Elastic Compute Cloud (EC2), Amazon Relational Database Service (RDS) and Application Load Balancer and other AWS services. This gives it the same level of security, reliability, and scalability that you expect from AWS. So, if you are looking for an easy-to-use and simple container service, Amazon Lightsail Containers is a great option.
Another benefit of Lightsail is its predictable and understandable pricing. The price for running your container and database is fixed per month and dependent on your choice of vCPU/memory and storage. All the pricing information can be found on the Lightsail pricing page.
If you outgrow Lightsail containers, you can easily deploy your container to Amazon ECS or Amazon EKS. You use the same containers that are running on Lightsail.
Solution Overview
To get your WordPress website up and running, complete the following steps. Launch a WordPress website using the official WordPress Docker container image running on Lightsail containers and create a Lightsail database. You can do all this from the Lightsail console, with no coding experience required.
Here are the steps that I walk through in this blog:
- Create a Database in the Lightsail console. WordPress uses databases to store posts, users, emails and more.
- Launch a WordPress website using the official WordPress container
- Deploy the container service onto Lightsail
- Configure the container service to the database
- Cleanup and next steps
See the following image for a representation of what your environment will look like at the end of this post.

Now that you understand the steps that follow in this post, let’s get started.
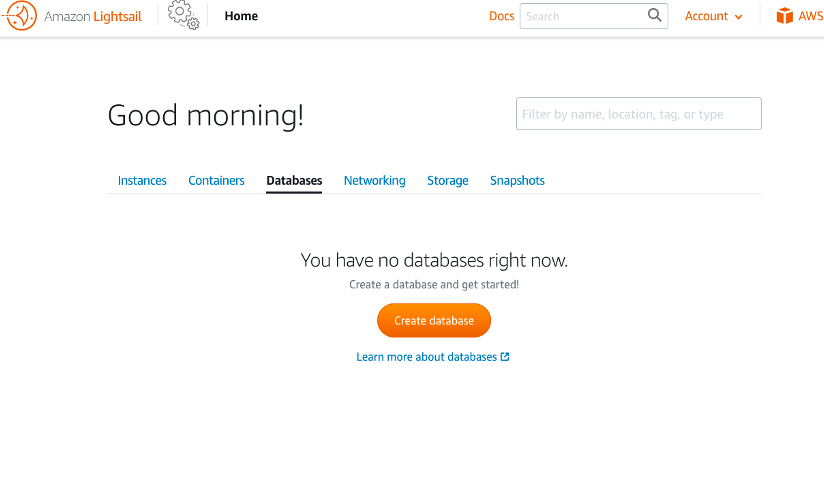
Create an Amazon Lightsail database
Navigate to the Lightsail console, and choose the Databases tab. Select Create database. The following image shows the screenshot of the Lightsail console where you create a database.
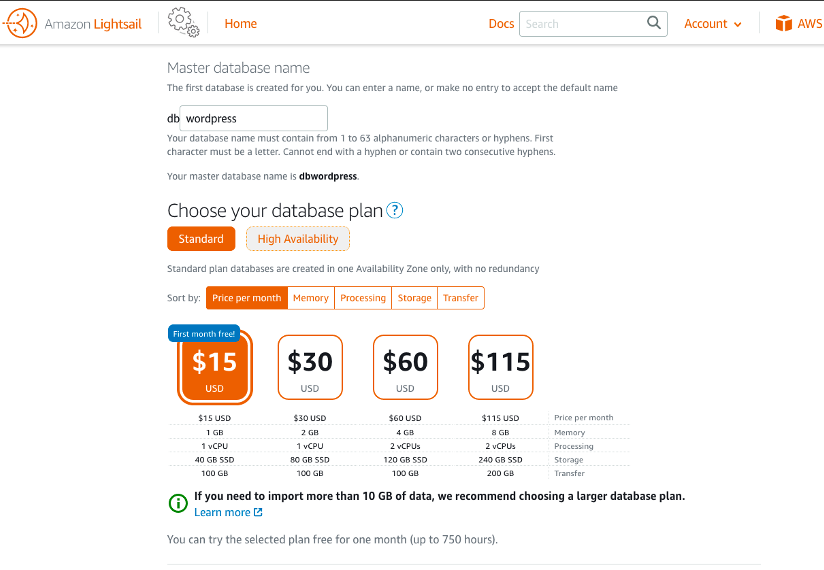
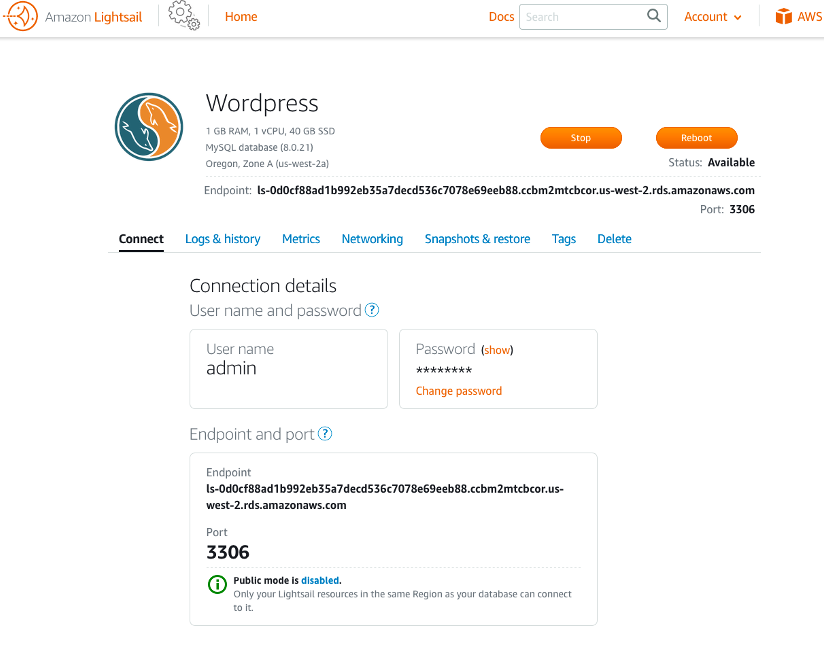
Next, select MySQL for the database type. WordPress does not have support for PostgreSQL, which is why you use MySQL. Set the database user name and password and note down the user name and password, as you need them later when you set up your container. For the database type, choose the latest version of MySQL as it is up to date on security and the latest new features.

After creating a password, set the database name. I set mine to dbwordpress. You need this database name later on in the setup.
You can customize my database plan to make sure it fits the needs of your workload. You choose between Standard or High Availability, and pick an instance based on its power (vCPU and RAM). High availability ensures that your databases run in multiple Availability Zones. In the case that a failure occurs in one of the Availability Zones, your database stays available in the other. For this blog, I’m creating a simple WordPress site and do not require the high availability. So, I use standard in order to reduce my costs.
For power, I chose one vCPU and one GB of RAM. I do not expect a high load on this database and I can always come back later and increase it. The power and availability options impact the price AWS charges per month. The price charged per months is adjusted as I make my availability and power choices.
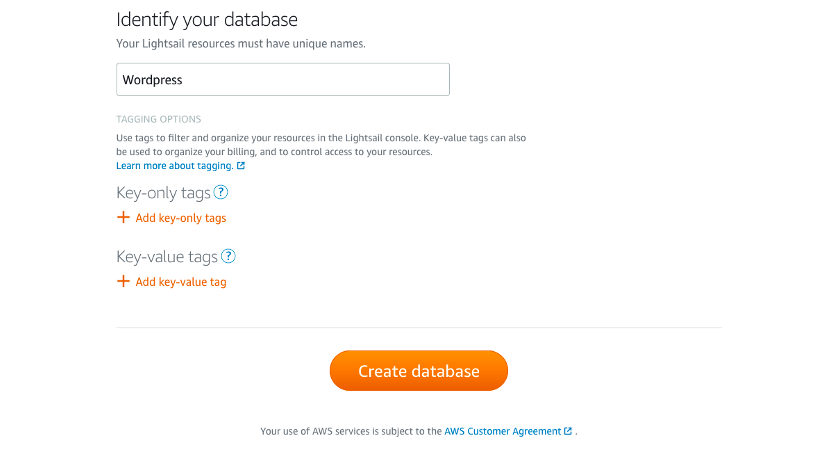
Before creating the database, give the database a name to identify it. Then, select Create database.
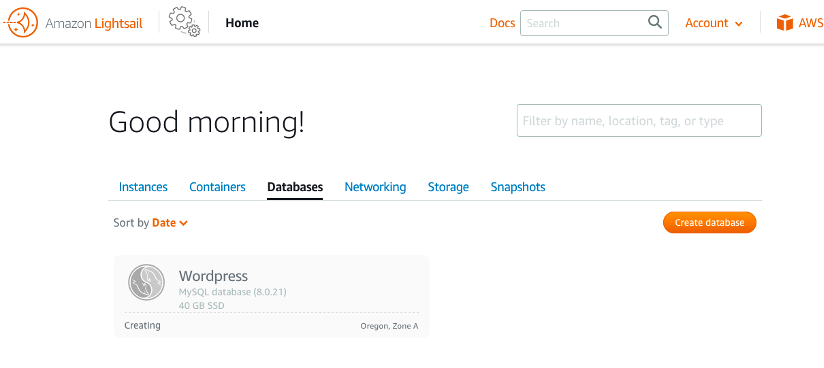
After clicking Create database, wait for it to finish creating before moving on to set up your container. The database takes several minutes to finish creating and become available for use. You can tell that it is up and running when the database color changes from gray to blue and the Creating messages disappears.
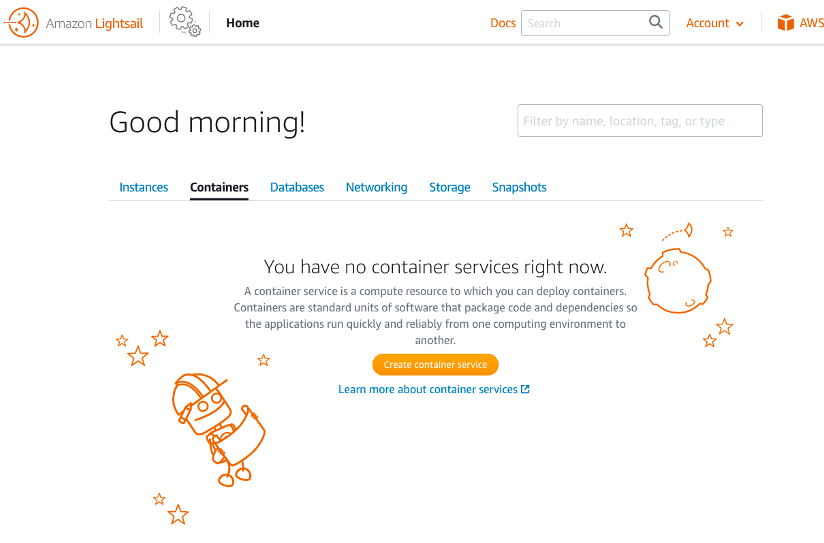
Deploy a container with Amazon Lightsail containers
Now, your Lightsail database is ready for use. The next step is to deploy a WordPress container using Lightsail containers. In the Lightsail console, choose the Containers tab and select Create container service. The following screenshot demonstrates what this looks like in the console.
As shown in the following screenshot, select the size of the container node that you want your application to use in terms of vCPU and memory. Also, select the number of container nodes you want to run for high availability and/or scalability. You can always come back later and change the number of containers or their power (vCPU and RAM), without interrupting your service. Both the number of containers and the power impact the price AWS charges you per month. The price is adjusted as you make your choices.
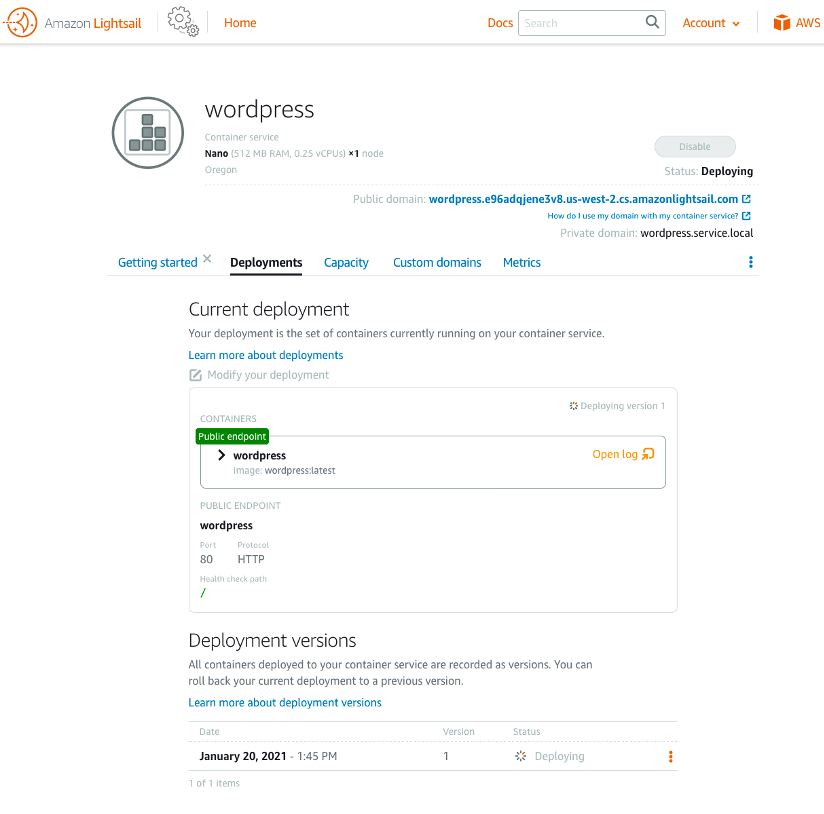
For this application, I chose a Micro bundle with one node. I do not expect my WordPress container to require more resources than one GB of RAM and 0.25 vCPU. This bundle is also free tier eligible.

In the following image, you can see the container service capacity options. These are also the deployment options. Here, I specify the container name, container image, environment variables and ports. For the container name I specify WordPress. The image is the official Docker WordPress image found on Docker Hub: wordpress:5.6.0. On the WordPress Docker Hub page, you can also find more information regarding this image, such as the environment variables you must use to connect WordPress to my database. Then, specify the database hostname, database user, database password, and database name. Also, open port 80 so you can reach my WordPress website over the internet.

The database hostname, database user, database password and database name can be found on the information page of your Lightsail database. I also noted down the user name and password in a previous step.
After you specified the environment variables, ensure that there is a public endpoint available to reach to container. This is so that you can reach your WordPress website from the internet. Lastly, give my service a name and select Create container service.
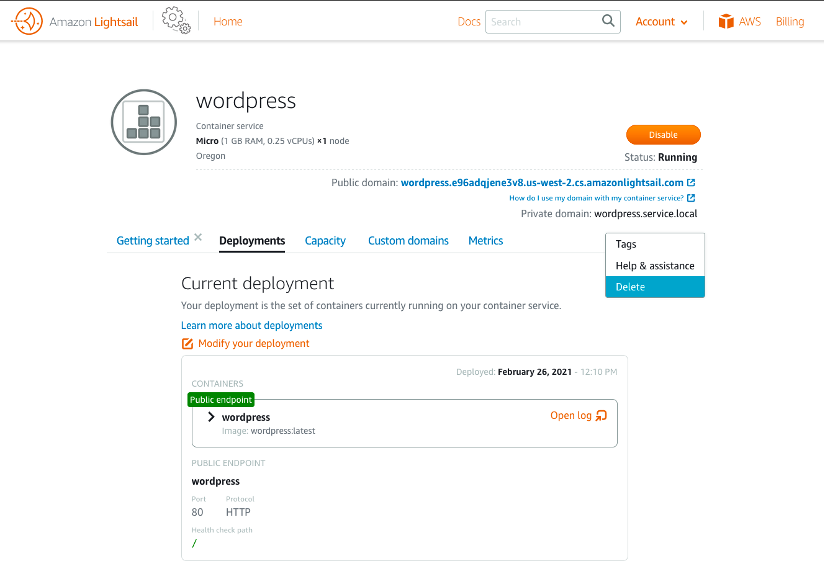
Once your container is done deploying, you can use your web browser to go to the public domain and view your WordPress website. On the website, you can follow the WordPress setup instructions to set up your WordPress website. Now, you have a containerized WordPress up and running with a Lightsail database.

In the next section, clean up my resources so you do not incur any additional costs.
Clean up and next steps
Now, you should clean up your Lightsail container deployment and the Lightsail database so you do not incur any further costs on your AWS bill. Start by deleting the Lightsail container deployment.
In the Lightsail console, go to the containers tab and choose the container deployment you created. This opens the Lightsail container deployment information page. From here, you can delete the container deployment by selecting the three dots. Choose Delete. After acknowledging twice that you want to delete your Lightsail container deployment, it is successfully removed.
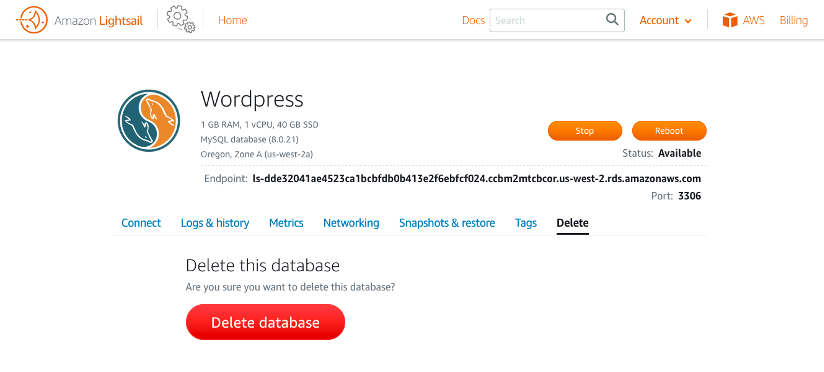
Next, go to the Lightsail database tab to remove the Lightsail database. Choose the WordPress database that you created. On the next page, click the Delete tab choose Delete database. Confirm that you want to delete your database. Your Lightsail database is now removed.
Now, all your previously created Lightsail resources are now removed.
Conclusion
A few suggestions as to what you can do next. Explore other Lightsail services such as Amazon Lightsail distribution. Use a Lightsail distribution to set up a content delivery network for your WordPress website.
You can also register a domain name using Amazon Route 53 and point it to your Lightsail containers public domain. This will make it easier for others to browse to your website. If you already have a domain name registered with a third party or want to use a third party like GoDaddy, you can use them to point to your website instead of using Amazon Route 53.
There are other publicly available Docker container images you can try out and run on Lightsail containers for example: Drupal, Joomla, and Magento.
You can also create your own container and launch it using Lightsail. The Lightsail Containers: An Easy Way to Run your Containers in the Cloud blog post walks through creating a simple Python web application and how to launch it on Lightsail Containers.
I demonstrated how easy it is to create a website using Amazon Lightsail containers and a Lightsail database. I created a database and launched a container in minutes.
I hope I was able to show you the flexibility of Amazon Lightsail containers and have given you a glimpse of the exciting world of containers.