AWS Open Source Blog
Deploying Python Flask microservices to AWS using open source tools
Data has become the language of business. Organizations leverage data to better understand and deliver value to their customers. As a result, there is a growing need in many organizations for flexible patterns that can be leveraged to develop new applications and functionality to interact with their data.
APIs, or application program interfaces, are a utility that can help to enable organizations continuously deliver customer value. APIs have grown in popularity as organizations have increasingly designed their applications as microservices. The microservice model configures an application as a suite of small services. Each service runs its own processes and is independently deployable. APIs work in conjunction with microservices as they can be leveraged to connect services together, provide a programmable interface for developers to access data, and provide connectivity to existing legacy systems.
In this article, we will demonstrate how to build and deploy an API running in a microservice architecture.
The project we will create addresses how to build and deploy an API to the AWS cloud using open source tools. Specifically, we will deploy a Python Flask REST API that will allow users to post their favorite artists and songs from the ’90s to an Amazon DynamoDB database. Flask is a micro web framework written in Python. We will containerize our Flask application using Docker, an open source tool used to create and execute applications in containers, and deploy it to Amazon Elastic Container Service (Amazon ECS). In addition to explaining how to configure an API, we will cover how to automate the deployment of AWS services using Terraform, an open source infrastructure as code software tool. Lastly, we will perform basic testing of the API we create using SoapUI, a functional testing tool for SOAP and REST-based APIs.
Finally, our goal is to provide the knowledge of how to deploy an API to the AWS cloud leveraging open source tools.
Solution overview
The following depiction illustrates the solution workflow. The diagram shows the process and a summary of what is being performed and delivered:
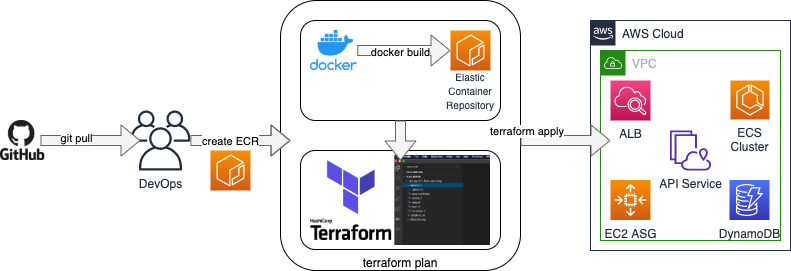
This diagram illustrates a typical manual deployment mechanism using the open source tools defined above. We are using GitHub to store code used in this blog in a repository. That information is retrieved using a git pull command by a DevOps team member. That team member then follows the processes defined in this article to create an Amazon Elastic Container Registry (Amazon ECR) repository for storing the Docker image. A docker build command is executed to create the container image, which is then stored in Amazon ECR. Terraform is then used to plan the architecture and apply the desired state configuration for the infrastructure and the API service running on ECS to a specified AWS account.
The following illustration shows the solution deployment in the AWS cloud environment:
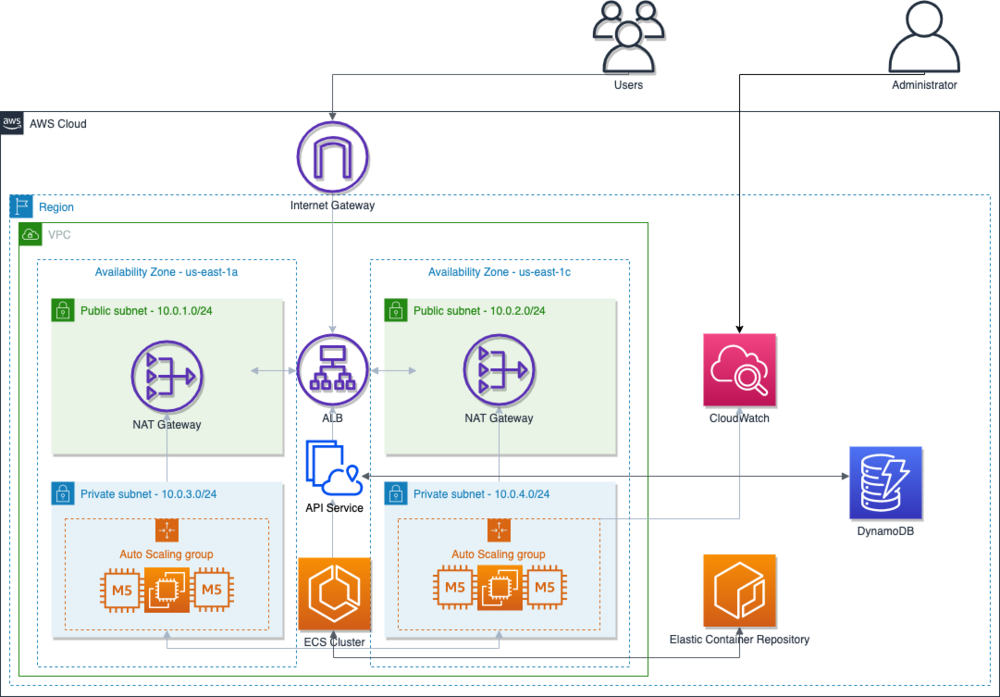
Let’s review the above diagram. We are deploying an Amazon Virtual Private Cloud (Amazon VPC) with two private and two public subnets. We have attached an Internet Gateway to our VPC so that we can access the internet. Our resources in the private subnets access the internet through NAT gateways in the public subnets. The application will be hosted on an Amazon ECS cluster running on Amazon Elastic Compute Cloud (Amazon EC2) instances, which will be located in the private subnets.
The ECS cluster will be launched with an Auto Scaling group and an Application Load Balancer (ALB). Users will access our application via a public load balancer located in the public subnets. For our backend database solution, we are using Amazon DynamoDB. Amazon CloudWatch is utilized to provide data and actionable insights to monitor applications, respond to system-wide performance changes, optimize resource utilization, and get a unified view of operational health. Lastly, Amazon ECR is used to host our container images.
Prerequisites
- An AWS account with local credentials properly configured (typically under
~/.aws/credentials). - The latest version of the AWS Command Line Interface (AWS CLI). For more information, refer to the documentation for installing, updating, and uninstalling the AWS CLI.
- Terraform 0.14.7+ installed on local workstation.
- Docker Desktop 3.1.0+ installed on local workstation.
- A Git client to clone the source code provided and a GitHub repository.
- Soap UI Open Source installed on local workstation.
- Python 3.6+ installed on local workstation.
- Boto3 installed on local workstation.
Application configuration
REST (representational state transfer) APIs are built on a subset of HTTP and are constrained by the REST architecture. They streamline interoperability between two computer systems and allow users to interact with a service via HTTP requests and responses. One advantage of REST APIs is that they provide flexibility. Data is not tied to resources or methods, so REST can handle multiple types of calls. REST APIs are stateless. Calls can be made independently of one another, and each call contains all of the data required to complete itself successfully. You will deploy a REST API backed by a DynamoDB database. Python has a number of web frameworks that can be used to create web apps and APIs. We have chosen to utilize Flask as it is a framework that has a set project structure as well as many built-in tools. These predefined structures can save time and effort for developers.
You will utilize Python Flask to build an API. Python Flask is a micro framework for building web applications. Our API defines two routes. The first route maps to /, and the second maps to /v1/bestmusic/90s/artist. These are the only paths recognized by the application. If you enter any other URL when accessing the API, you will receive an error message. You can define specific error responses in the API routes.
For example, referencing the Python functions in the get_artist method, “Artist does not exist” is the response returned when a users requests an artist that is not present in the DynamoDB table (musicTable). The create_artist method posts an artist and song to your DynamoDB. If malformed data (i.e., data that is not structured properly) or a payload with required fields is sent to the API using this method, a “Please provide Artist and Song” response will be returned. Take some time to review the application configuration.
Open the Dockerfile located in app directory. We are utilizing the python:3.8-slim docker image to keep our image as small as possible. This docker image is created using a multi-stage build. Using this approach, you can selectively copy artifacts from one stage to another. This allows you to leave out anything you do not want in the final image. In this case, we will create one image for building the app and another image for running it. Adopting this pattern, separating the build/run, greatly reduces our final image size resulting in faster deployments. Please take time to review this configuration.
Now clone the source code repository; you will use this to deploy the solution:
Application build
You will be deploying the REST API to Amazon ECS. Your application will be hosted on an ECS cluster located in private subnets. Users will access the application through an ALB. We will deploy this infrastructure later in the article.
Now, let’s walk through the steps of building our application. This will require you to build a Docker image locally, tag the image, and then push it to a registry. We will use ECR as our registry. Let’s build and push our container image to ECR.
1. First, you will need to create an ECR repository. Run the following AWS CLI command from your terminal:
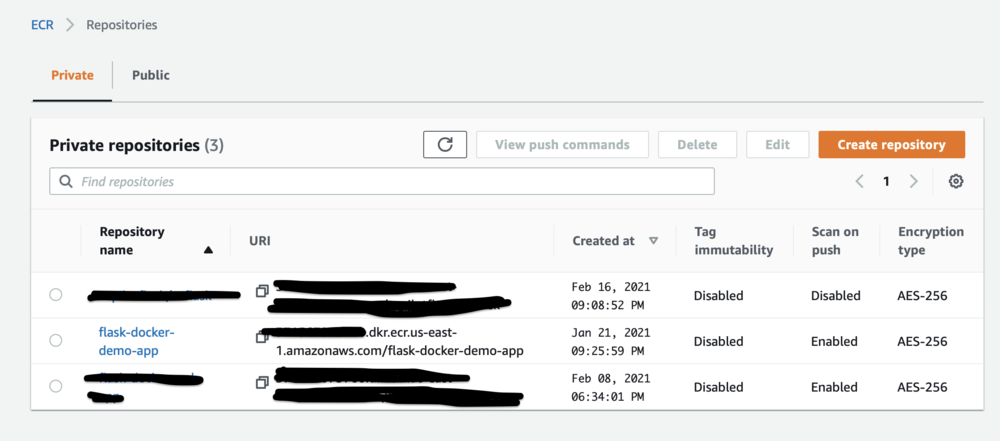
The output should look like the following:
2. In the AWS Console, open Services, Elastic Container Registry. Select the flask-docker-demo-app as seen in the following image:
For successive commands, replace <AWS_ID> with your AWS account ID.
3. Now, log into ECR from the command line. Run the following command:
The output should look like the following:
4. Navigate to the root of the repository and run:
5. Run the following image to build the Docker image:
The output should look like the following:
6. Run the following command to tag the Docker image and make sure to update the command with your account ID:
7. You will now push your newly created Docker image to ECR. Recall that in Step 1 we authenticated to ECR, so now all that remains is to deploy the image to ECR. Run the following command to deploy the image to ECR:
The output should look like the following:
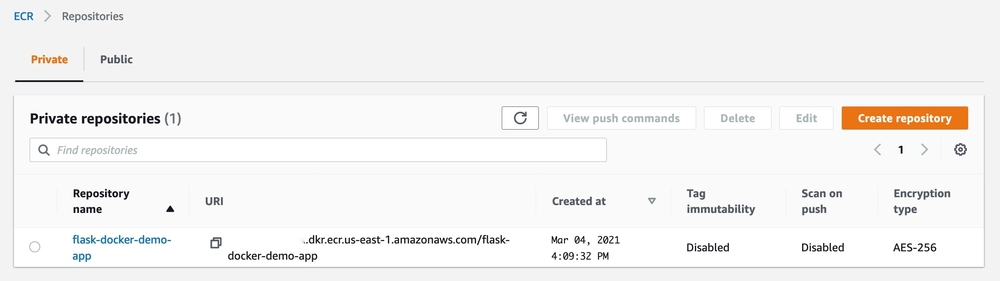
Note the URI value highlighted above, as we will reference this value later in the article.
You can also verify and retrieve the URI for the image repository in the AWS console. Open Services, Elastic Container Registry, Repositories. Select the flask-docker-demo-app repository.
Terraform overview
Terraform is an open source infrastructure as code (IaC) software tool developed by HashiCorp. Terraform provides a means to define infrastructure as code on numerous platforms, including Amazon Web Services. With Terraform, you can draft declarative configuration files in HashiCorp Configuration Language (HCL) to describe the desired state configuration for resources in various cloud environments. With HCL, architects can quickly and efficiently define complex infrastructure in a simple and intuitive manner.
Terraform is used to deliver the infrastructure for running the container environment. In order to execute the commands to test the code and deliver the environment, you should first run a Terraform command to initialize the working directory for Terraform on your workstation. Run the following command in the terraform directory:
This results in the following console output:
Once the working directory has been initialized, you’ll want to examine the content of the Terraform directory structure. Here, we can see that several .tf files exist. These files represent the Terraform configuration files that are used by the Terraform client to deliver the desired state configuration for the target environment.
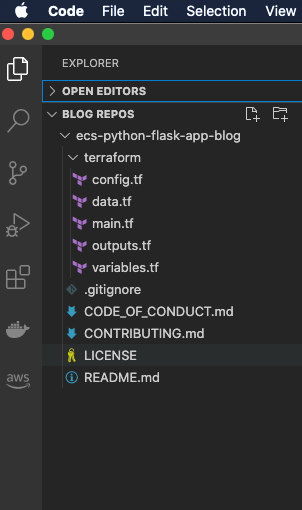
These files are described as follows:
- config.tf: This file contains the Terraform provider and AWS module version constraints or requirements. Other provider information can be passed here. The AWS Region is specified here for the purpose of this article.
- data.tf: This file acts as a data handler. It retrieves specific information for later use by other resources.
- main.tf: This is the main execution file.
- outputs.tf: This file contains outputs to be passed to the shell during execution that are also made available to other modules at runtime.
- variables.tf: This file provides input variables for the Terraform configuration.
- README.md: This file provides the user information regarding the usage of the code for simulating an environment.
Typically, several sub-modules will be used to separate functions within a stack deployment as they align to different aspects of the infrastructure. In this capacity, variables files also control environment specific configurations. For the sake of simplicity, a single module will be used for the demonstration in this article.
This Terraform template is designed to define a set of specific resources and will perform the following tasks:
- Define the desired state configuration for security, resources, and configurations for delivering defined elements using infrastructure as code concepts.
- Separate security configurations, cluster configurations, and bootstrapping processes into source control managed definitions making them reusable, defined, and flexible.
- Provide a functional process whereby an ECS cluster with these defined dependencies can be effectively leveraged and quickly delivered.
The Terraform code will deliver resources that pertain to the following configuration aspects:
- IAM: Identity access management policy configuration
- VPC: Public and private subnets, routes, and a NAT Gateway
- EC2: Autoscaling implementation
- ECS: Cluster configuration
- ALB: Load balancer configuration
- DynamoDB: Table configuration
- CloudWatch: Alert metrics configuration
Deploy application with Terraform
Now we want to perform basic steps and deploy our Terraform code. Within the same directory as specified for the initialized Terraform environment, we want to first run commands to perform basic tests. Once those tests are completed, we can then deploy the environment for our API service.
Pre-deployment testing
To evaluate the Terraform configuration files for syntax issues and for consistency with the style guide, the following tasks are recommended before deploying from this template into an environment.
Run a Terraform FMT
terraform fmt is used to check the formatting of a Terraform file to ensure that it meets suggested formatting according to the Terraform style guide. By default, terraform fmt will rewrite Terraform configuration files to meet the style guide.
To run a terraform fmt check, run the following command from the terraform directory:
If any files contain formatting errors, the file containing the errors will be listed in the console output by the filename.
If you do not want Terraform to overwrite any files on execution (e.g., if running in a pipeline), run the command with the following switches:
If any files contain formatting errors, the file containing the errors will be listed in the console output by the filename.
Run a Terraform validate
terraform validate is used to validate that Terraform configuration files in a module are syntactically correct, referentially consistent, and consistently parameterized. The terraform validate command is helpful as a step in evaluating modules prior to execution as it will display errors within this scope.
To run a terraform validate check, run the following command from the root module directory:
If the Terraform configuration is valid, you will receive the following message:
The validation warnings can be disregarded as we are passing in interpolated expressions intentionally in these fields.
Run a Terraform plan
terraform plan is used to create an execution plan. Because Terraform is an orchestration tool used to automate resource delivery in various environments, a terraform plan action is provided to give administrators the ability to review the expected changes to an environment. terraform plan will show resources are being added, changed, or destroyed based on the provided variable inputs passed to the module during execution. terraform plan is an ideal instrument for change control processes, audit trails, and general operational awareness. Often, in a pipeline, terraform plan will be executed with a tollgate for an approver to accept or validate the environment changes prior to executing a change.
To run a terraform plan, execute the following command from the root module directory:
When prompted to provide the ECR image path, copy the URI from the Application Build phase shown above:

Press Enter to run the terraform plan.
Deployment
Now that we prepared the environment and performed pre-deployment tests, we can proceed with deploying the application environment using Terraform. To do so, within the Terraform directory, run a terraform apply command referencing any variables files used for your account environment.
terraform applyis the command used to change a desired target state for an environment. You will be prompted for changes made to an environment prior to deployment. The response for this action may be automated using a switch at the time of execution.
To run a terraform apply, execute the following command from the root module directory:
When prompted to provide the ECR image path, copy the URI from the Application Build phase seen above.
During the build process, the console output shows the status of the resources as they are being provisioned to the target AWS account:
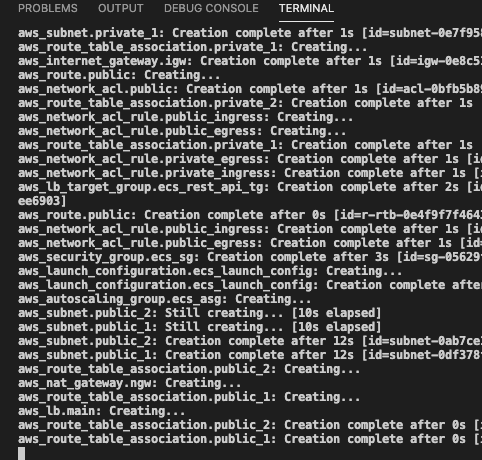
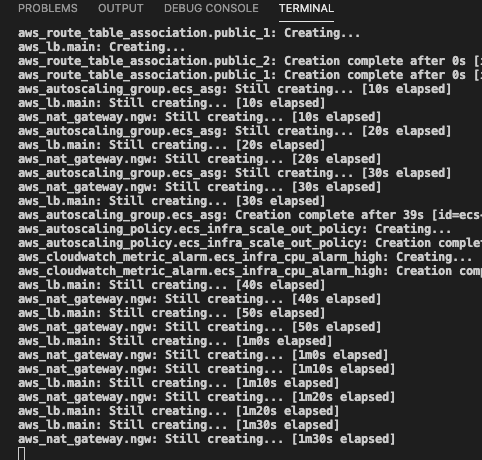
When the process completes, you will receive the following message:
Retrieve the DNS name for the load balancer from the alb_dns_name output seen above. Navigate to this address in your web browser as follows:

The Hello World! message means that the service is responding. Now we can test our service!
API testing
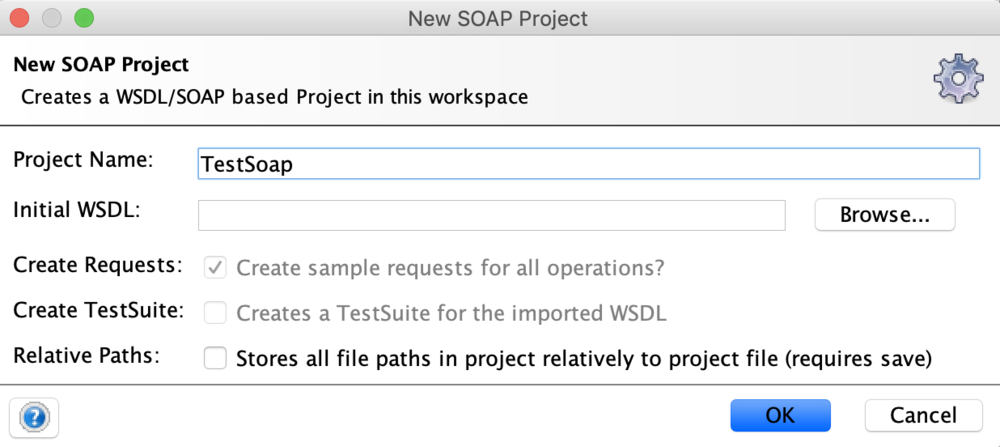
1. Open the SoapUI Application and select New SOAP Project.
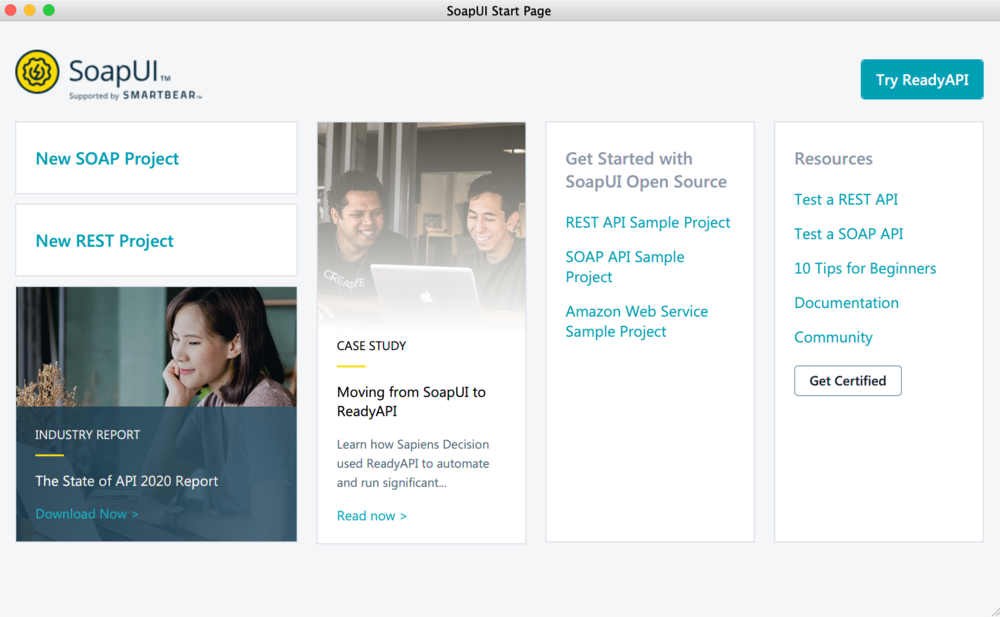
2. Under Project Name, enter TestSoap and select OK:
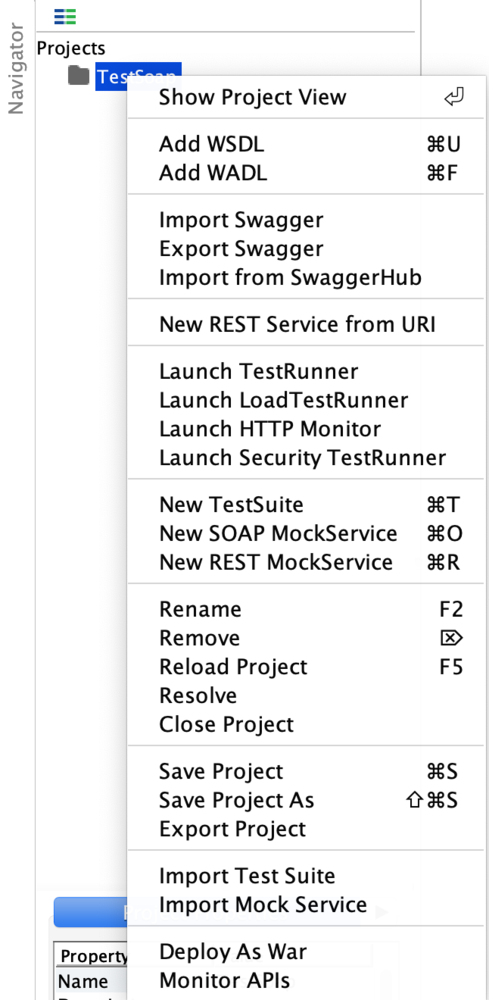
3. Scroll to the Navigator, right-click on the TestSoap project under Projects, and select New REST Service from URI:
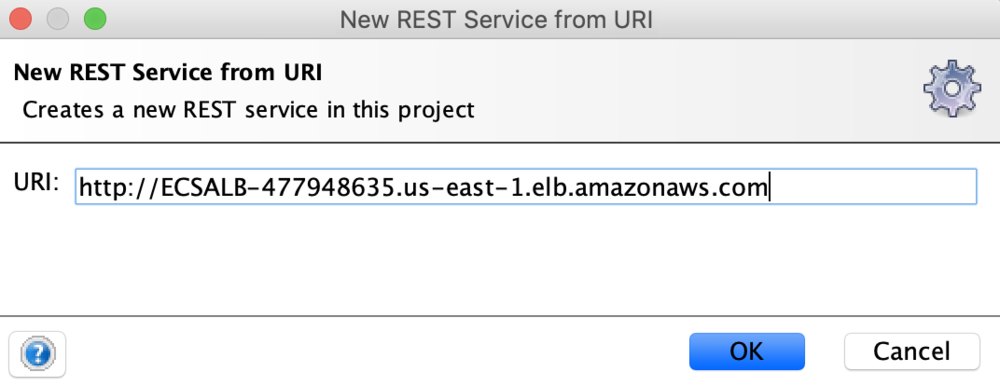
4. Enter the DNS name of the load balancer:
5. Select HTML and then the choose the green arrow to execute a GET request from the base URL:
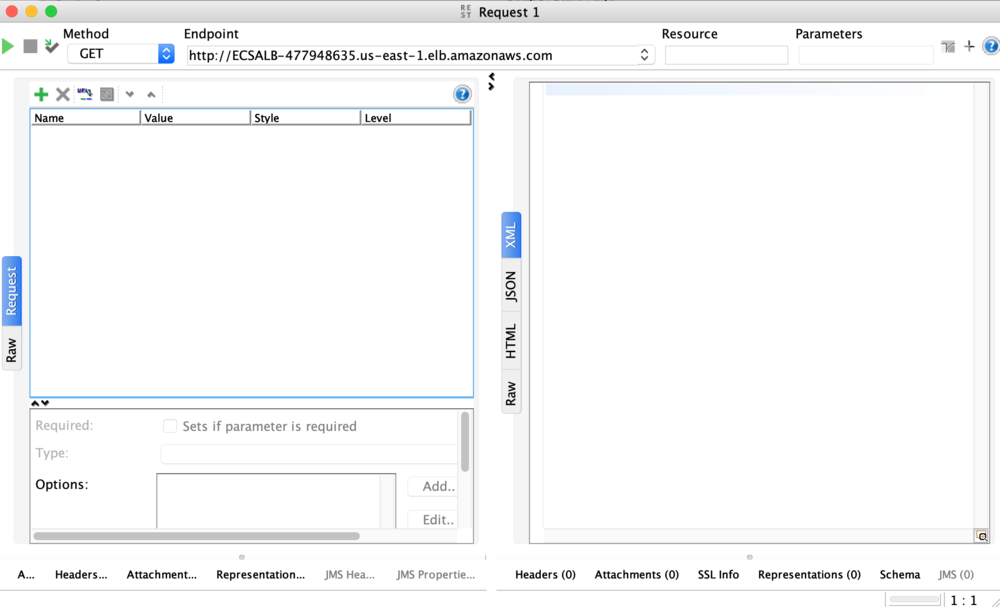
6. You should get a response similar to this:

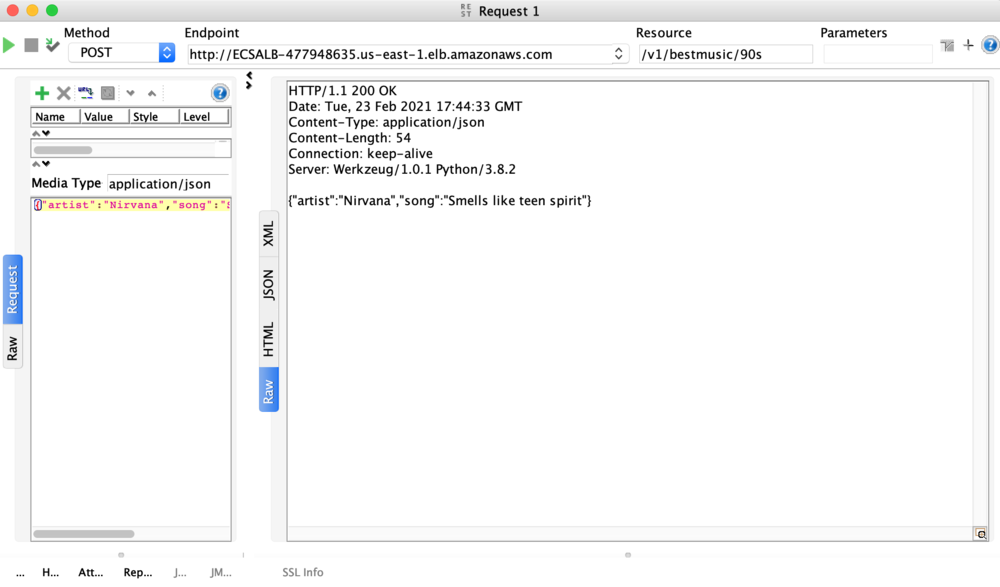
7. Now, let’s write data to our DynamoDB table. Update Method to POST. Under Media Type, select application/json and copy the following text into the text box.
8. Add /v1/bestmusic/90s to Resource block. Update the Response to Raw and press the green arrow. The output should be something like this:
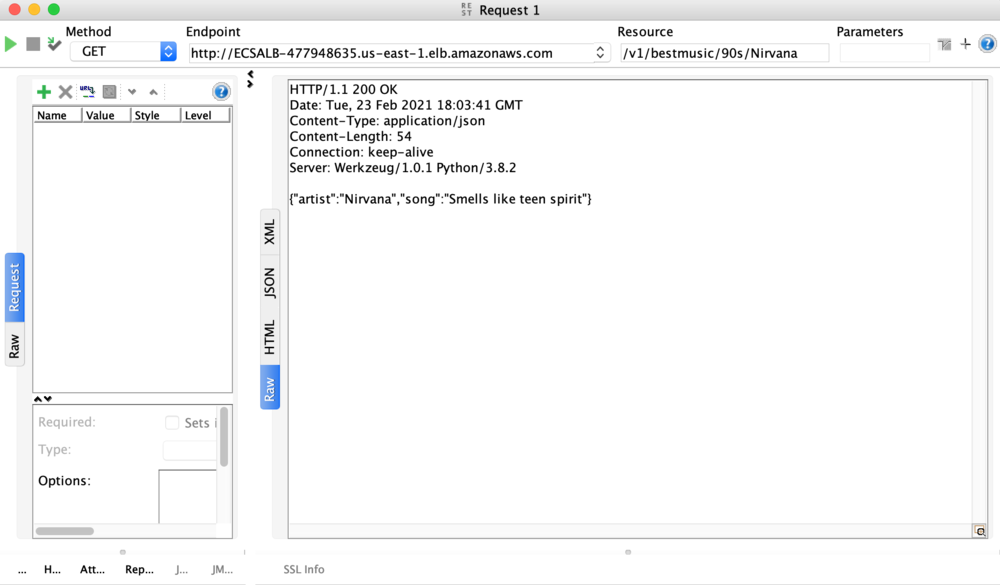
9. Now let’s see whether we can read the data that we just wrote to DynamoDB through our API. Update the Method to GET and update the Resource to v1/bestmusic/90s/Nirvana. Select the green button; you should get an output similar to this:
Clean up
To destroy an environment based on the information in the state file and delete all of the AWS infrastructure you previously deployed, run the following command from the root module directory:
terraform destroyConclusion
In this article, we explained how to use popular open source tools in conjunction with AWS services. We walked through how to build, deploy, and test a Python Flask API to Amazon ECS. We also explained how to deploy infrastructure to AWS using Terraform. Thank you for reading!