AWS Robotics Blog
AWS announces a new developer desktop feature within the AWS RoboMaker IDE
This blog references AWS RoboMaker Integrated Development Environment (IDE), a feature that has been deprecated. To follow along with this blog post, use the AWS Cloud9 IDE. See our updated blog on how to Build and simulate robotics applications in AWS Cloud9.
Introduction
Amazon Web Services (AWS) has released a new Integrated Developer Environment (IDE) desktop feature within AWS RoboMaker. This new feature allows iterative development and testing of your robotics algorithm code through your web browser, speeding up your development time.
The AWS RoboMaker IDE is based on the AWS Cloud9 IDE for writing, running, and debugging code, and is preconfigured with ROS and Gazebo for robot model simulation. Previously, the AWS RoboMaker IDE enabled you to edit, build, and upload your code to a simulation job. That process took several minutes each time a code change was made. The AWS RoboMaker IDE now provides a full Ubuntu desktop through the browser. This provides you the ability to run robot and simulation applications and interact with them via Gazebo, RViz, and other tools directly, as though they were running them on your own desktop. The ability to run the simulation within the browser, without requiring the bundle and upload steps, speeds up the iterative develop and test process.
In this blog, I will walk you through the changes to the AWS RoboMaker IDE, and provide an example of downloading code, building, and running a simulation while in the IDE.
Prerequisites
To create a new development environment, in your AWS account, from the AWS RoboMaker console choose Development Environments then Create environment.
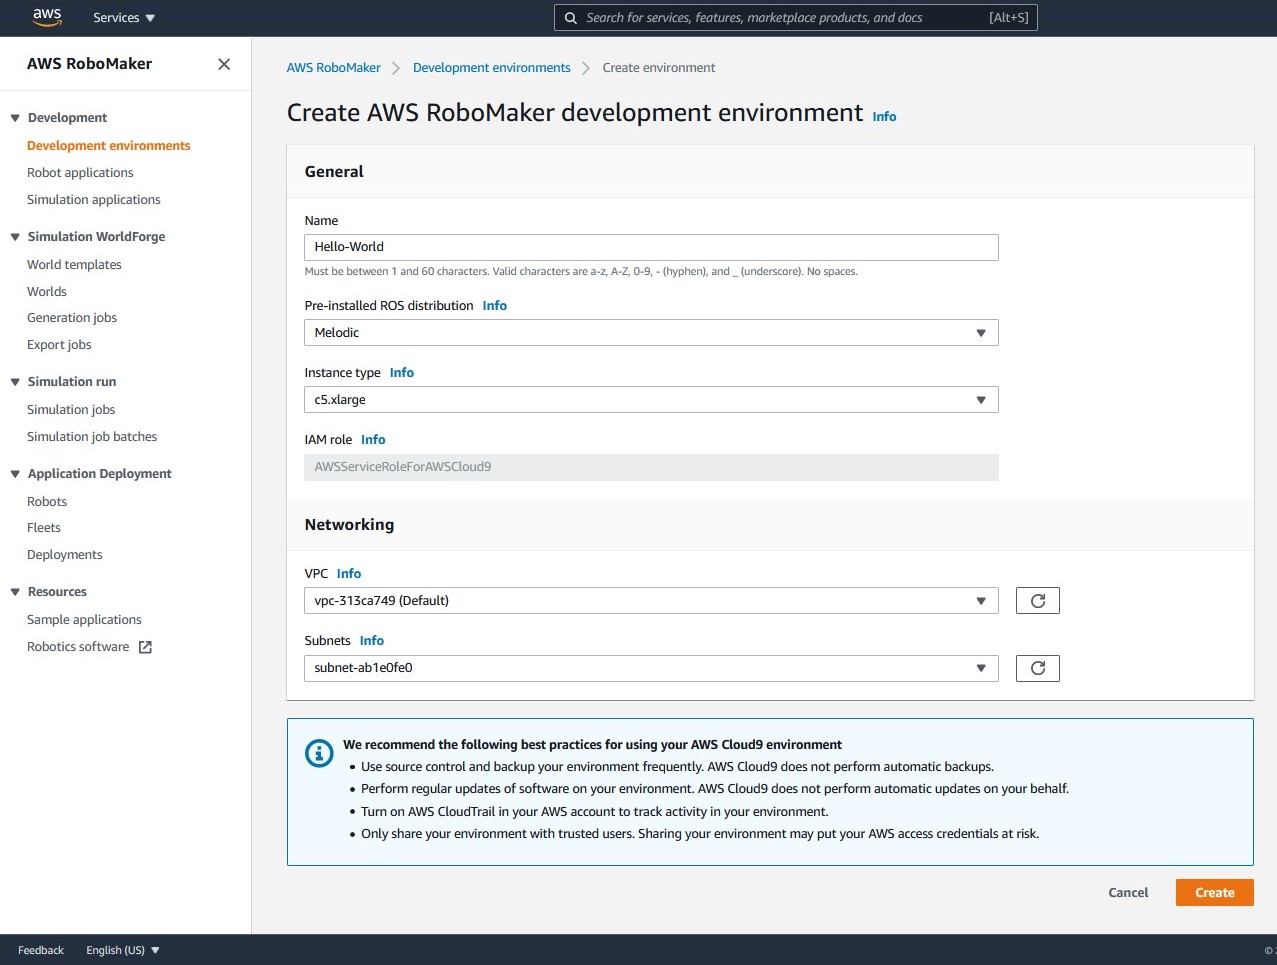
AWS RoboMaker Development Environment
- Give your development environment a name, for example Hello World and choose Melodic as the ROS distribution.
- Choose an instance size, for simulation we recommend a xlarge instance or larger, however prices vary by instance size.
- Choose your default VPC and a subnet. Your development environment should load in about one minute.

The development environment has now added a drop-down menu item for Virtual Desktop. This will open a new browser tab that has a full Ubuntu desktop.
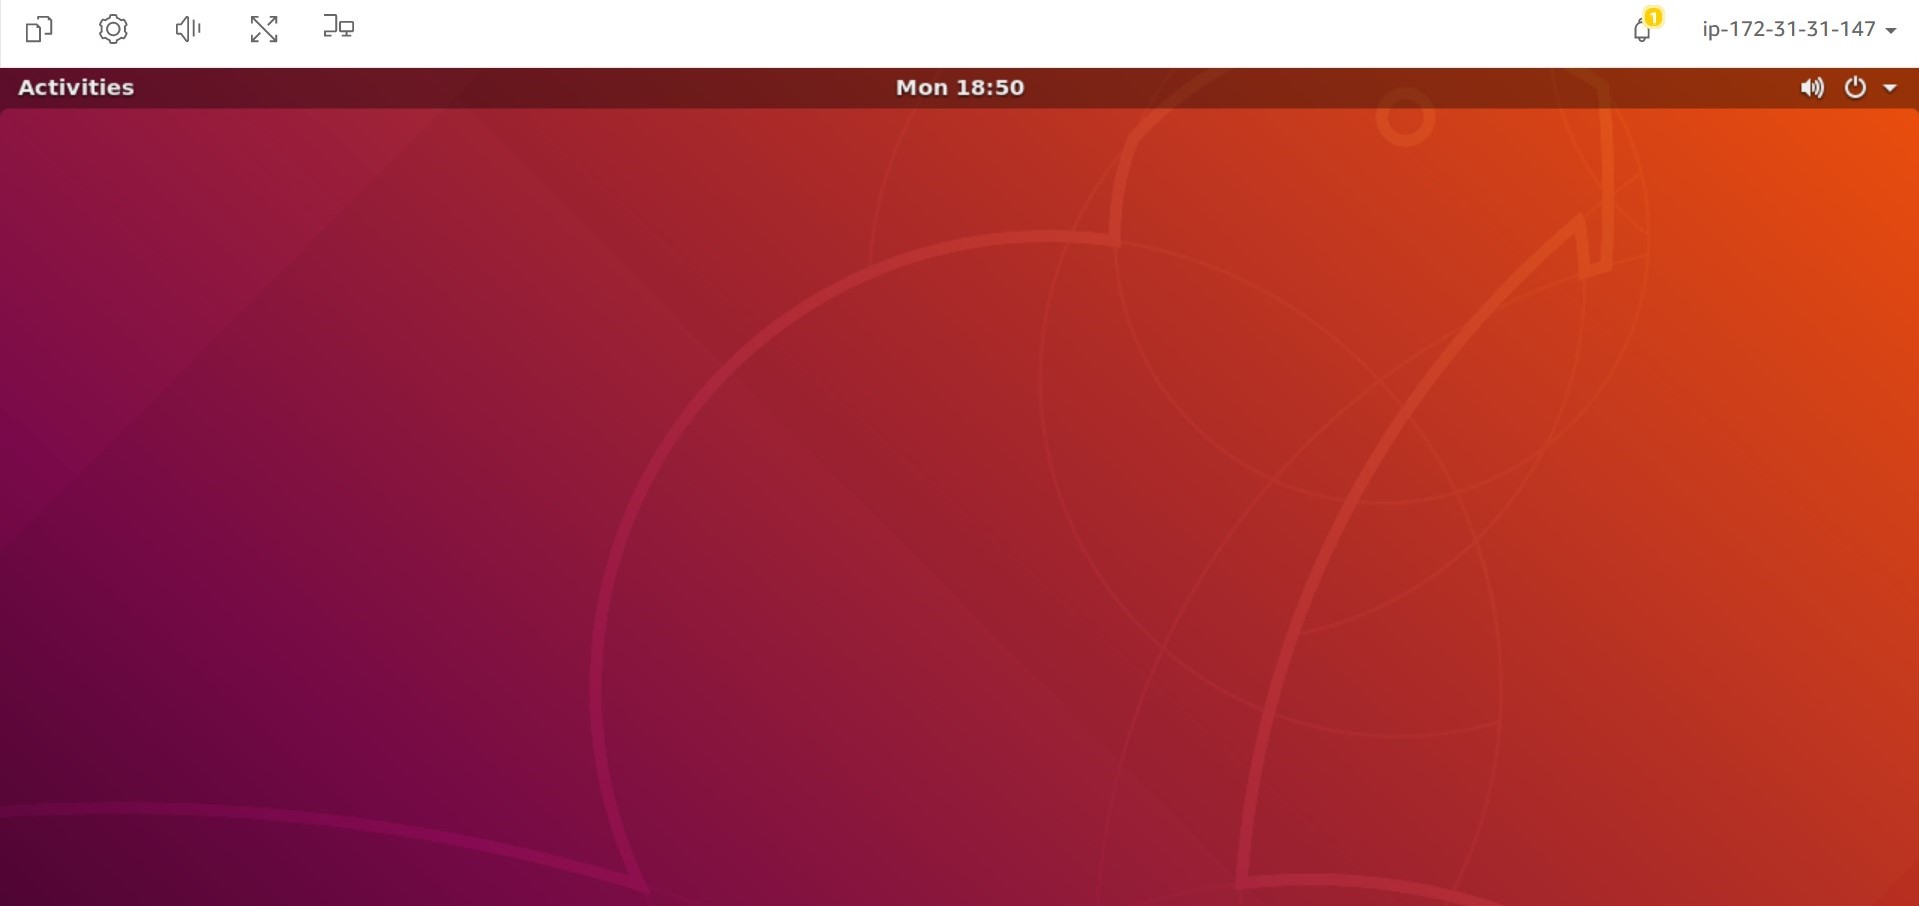
Ubuntu Desktop
- Within the desktop tab, you can start applications by choosing the Activities menu, then choosing from the list or searching for your application. You can also start applications from any terminal within the development environment and see them appear on this desktop view.
- Next, I show you how to download and run the AWS RoboMaker Hello World sample application, and stream, view, and interact with the simulation on the Ubuntu desktop.
Build and run the Hello World sample app.
- From the development environment, select Clone Hello World sample from the Get started

- Click on the bash terminal tab in the lower portion of the IDE, then use the following bash commands to build the simulation application.
sudo apt install python3-vcstool -y

cd ~/environment/aws-robomaker-sample-application-helloworld/simulation_ws

vcs import < .rosinstall

rosdep install --from-paths src --ignore-src -r -y

colcon build- Set the display and launch the simulation with the GUI enabled.
source install/setup.bash

export DISPLAY=:0

roslaunch hello_world_simulation empty_world.launch gui:=true| Note: Setting gui:=true can cause errors when using other features in AWS RoboMaker. Further details are located in the “Run a simulation job” section following. |
- Then open another terminal tab, build and launch the robot control node using the following bash commands.
cd ~/environment/aws-robomaker-sample-application-helloworld/robot_ws

vcs import < .rosinstall

rosdep install --from-paths src --ignore-src -r -y

colcon build

source install/setup.bash

roslaunch hello_world_robot rotate.launch- View your virtual Ubuntu desktop and you should see a Gazebo client with a Turtlebot3 slowly rotating.
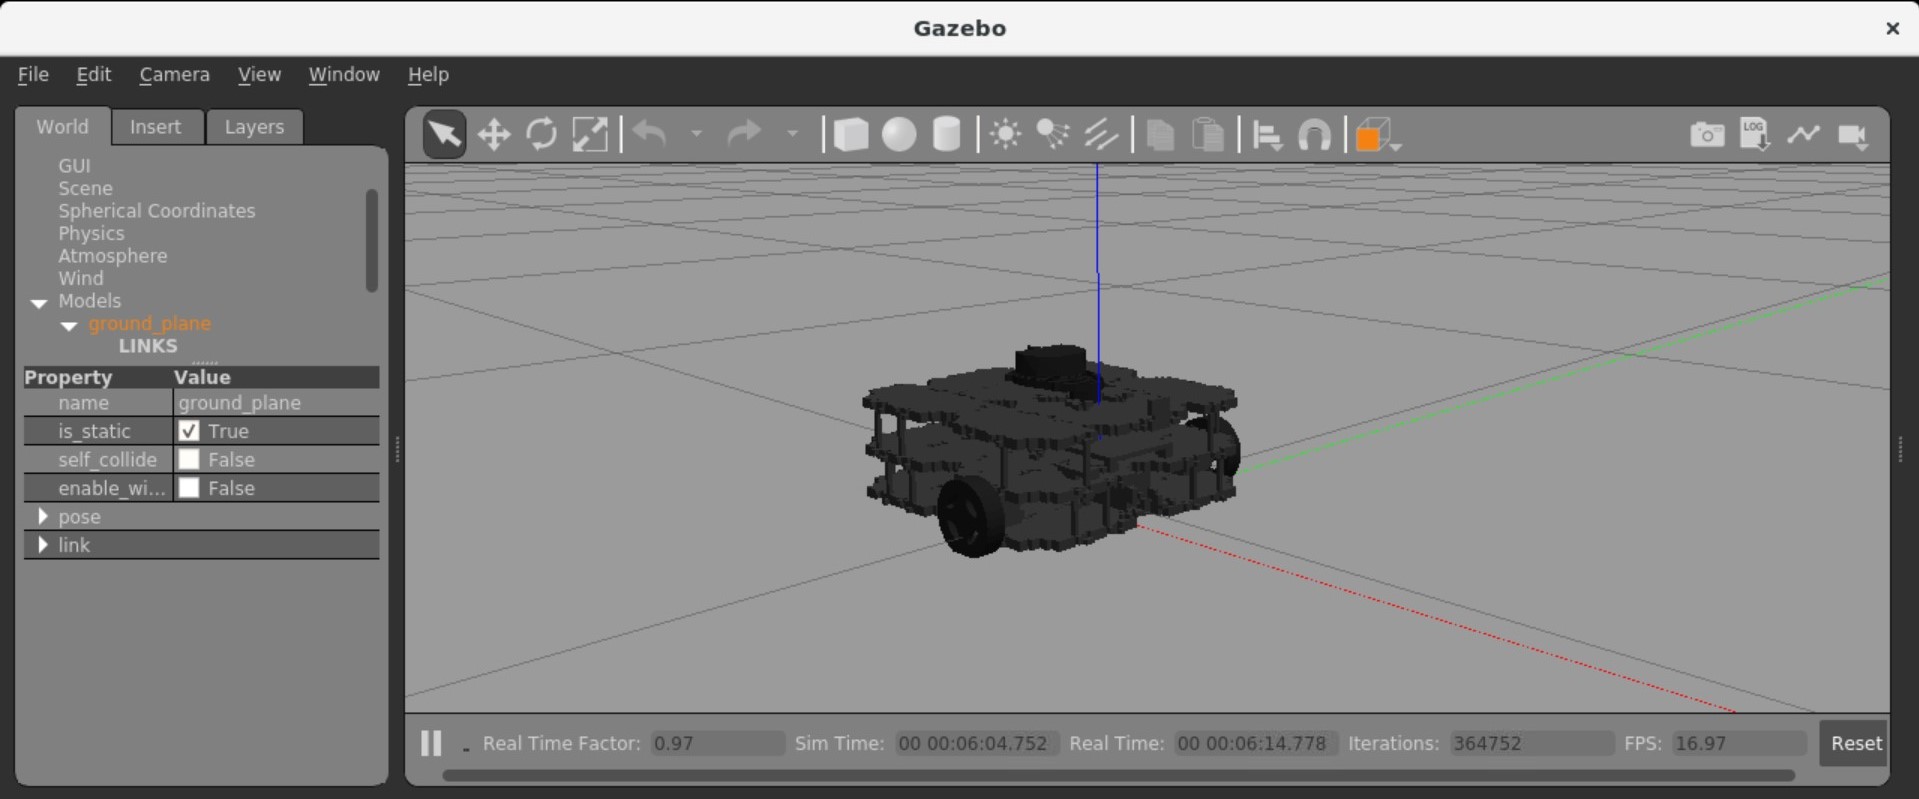
- Now return to the development environment and open another bash terminal. Within each terminal, you can run other visual tools such as RViz and RQT to view or interact with the robot simulation. You can also introspect to view what nodes are running by entering ROS commands within the terminal.
rosnode listThere should be a node listed named /rotate, which is the node defined in the Python file:
/aws-robomaker-sample-application-helloworld/robot_ws/src/hello_world_robot/nodes/rotate.py
The rotate node sends messages to the robot in simulation to make it rotate. You can make code changes by opening the rotate.py file in the IDE and repeating the build and launch steps preceding. The AWS RoboMaker Getting started documentation has more information for using the sample applications.
Run a Simulation Job.
Finally, once you have a working simulation, you can bundle it, upload to Amazon S3, and create a simulation job to run it. This is still useful for running a simulation as part of a CI/CD flow or other batch jobs. To view the AWS RoboMaker console, return to the IDE tab, select the robot symbol from the menu, then open the AWS RoboMaker console.
| Note: Before running a simulation job in AWS RoboMaker simulation, check the gui argument in the launch file. The launch file starts the Gazebo server, and setting gui:=true will also launch the Gazebo client that is used for viewing the simulation on the Ubuntu desktop. However, when running an AWS RoboMaker simulation job, the Gazebo server and client are started separately and you should ensure that your launch files do not set the gui argument to true. You can start and configure the Gazebo client in the AWS RoboMaker simulation service using the simulation tool configuration. |
Clean Up
Once you have finished using the IDE, to clean up any resources used, open the AWS RoboMaker console.
- Close your development environment browser tab
- You can either leave it for use another time OR you can delete it by choosing Development environments from the RoboMaker menu, choosing your environment from the list (ex: foxy-nav2-demo), then selecting Delete
Conclusion
In this blog, I showed the new AWS RoboMaker development environment with a full desktop experience, which is useful for iterating quickly on a simulated robot. I then reviewed a step-by-step tutorial of how to download and run a sample application, and view it in simulation in the desktop. To learn more about AWS RoboMaker, visit the AWS RoboMaker webpage or contact us.