Front-End Web & Mobile
Restoring AWS Amplify project after deleting it from the cloud
This article was written by Olajide Enigbokan, Startup Solutions Architect, Startups
In the process of using AWS Amplify, you may make mistakes. One of the mistakes you want to avoid involves mistakenly deleting your Amplify project. It would be a relief to have procedures in place to easily restore your Amplify project instead of having to re-create app resources from scratch during your app development lifecycle.
This blog demonstrates how to use AWS Amplify CLI to easily recover a deleted Amplify project from the cloud.
Note: Following the steps below will restore your Amplify resources such as DynamoDB tables, API’s, Amazon Cognito Userpools, etc.; but not necessarily restore the content within those resources (i.e. database entries, files, users, etc.)
Prerequisites
This walk-through has the following prerequisites:
- An AWS account
- Existing Amplify Project
- Installed the Amplify CLI
- Basic knowledge of Amplify Console and Amplify CLI
Deleting an Amplify Project
There are currently two ways you can mistakenly delete your Amplify project. They are follows:
1. From the Amplify Console
2. From the Amplify CLI, by running the following command:
amplify deleteThis command deletes all of the resources tied to the project from the cloud.
Procedure to simulate deletion of amplify project:
1. Log in to the AWS Amplify Console
2. Click on your Amplify application
3. Go to the top right-hand corner and select “Delete app” from the actions drop down – wait for a few minutes as your application is deleted
4. Now, go to the Amplify CLI and run the following command:
amplify status5. After running the command from (4), you would observe that your Amplify project resources have not been deleted. The screen shot below should be similar to what you see in your environment. In my case, I only have an API as my backend resource. In your case, you might have more resources:

Procedure to restore amplify project:
At this stage, you are tempted to run the command amplify init. This will not fix the issue of deleted resources. Follow the steps below to restore your Amplify project:
1. Go to your IDE (Integrated Development Environment) and in the root of your project folder, look for the “amplify” sub-folder. Under the amplify sub-folder, find the file named “team-provider-info.json”. This file contains deployment related information and resource references for your amplify project that was deleted. The screen shot below describes this:
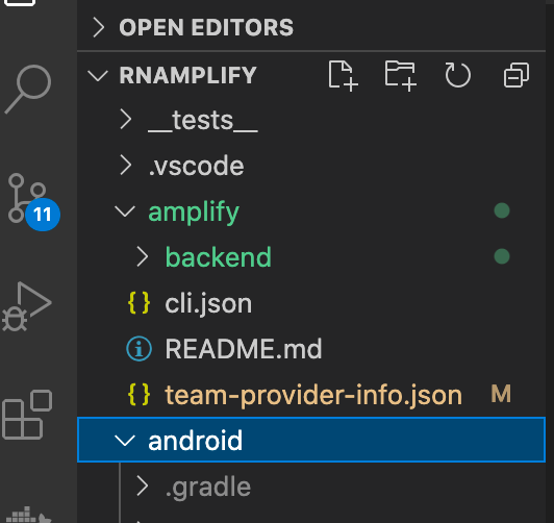
2. Delete the “team-provider-info.json” file.
3. Run the following command:
amplify initThis command is used to initialize a new project, set up deployment resources in the cloud, and make your project ready for Amplify. However, we will be using this command to re-create your Amplify project/environment in the cloud. You should run the above command in the root of your app directory
4. You are presented with a set of questions. For the question “Enter the name of your environment”, you can use the previous name of your Amplify project. As seen in the screen shot, I used “rnamplify”. It is important you select “yes” for the question “Do you want to use an AWS profile?” so that your command does not fail. I used “default” as my AWS profile. The following screen shot provides more information on this:
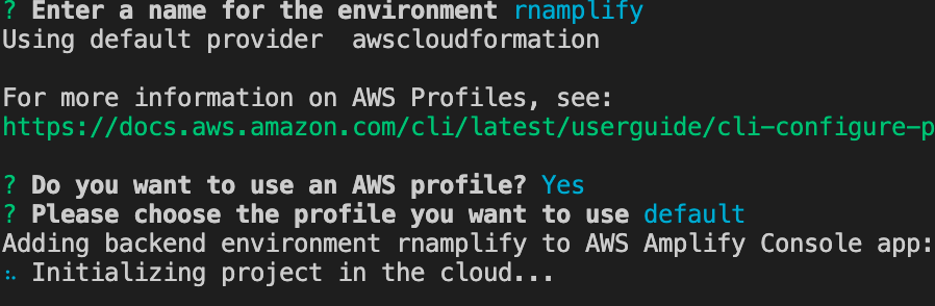
5. After running this command, wait until your environment has been initialized successfully.
6. Go to the AWS Amplify Console and view your restored Amplify project. Notice that your resources in your project have not been restored. You can try looking for the resources in the AWS Console but you would not find them. You need to restore those resources. Because the resources (Example: Authentication, API, Storage etc.) have not been restored, running amplify status gives you the following:
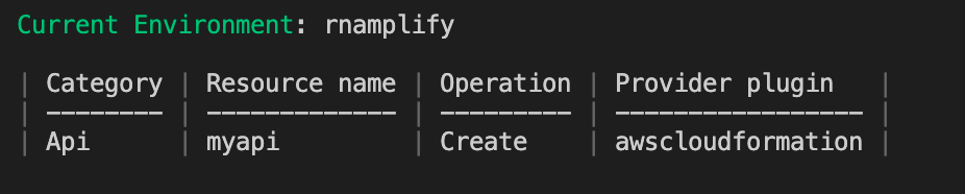
Notice that the operation column is no longer “No change” but “Create”.
7. To restore the above resource, you must run the following command:
amplify <category> pushIn my case I replaced <category> with “api” since my resource is an API. More information about other related workflows for <category> can be found in this link: https://docs.amplify.aws/cli/start/workflows
Running the above command pushes your current resource to the cloud.
8. Notice that a new “team-provider-info.json” has been generated in your project folder.
9. Verify that your resources have been deployed to the cloud as they were before you deleted your project. Verify this by checking the AWS Console, checking your amplify sub-folder or running the command:
amplify status10. Finish
Best practices to follow in order to avoid deleting your Amplify project:
Adopt the following best practices in your AWS accounts/environment to avoid mistakenly deleting your Amplify project:
1. Limit access to production accounts
2. Leverage IAM Policy to grant or restrict actions across Amplify categories
3. Identity and Access Management for Amplify
4. Security best practices in IAM
5. Best practices for managing AWS access keys
6. Guidelines for When to Use Accounts, Users, and Groups
Conclusion
With these steps, I was able to simulate a deleted Amplify project, restore the project using the Amplify CLI, and prescribe best practices that can be adopted to avoid deleting your Amplify project.
Happy building!
— Ola
Author bio

I have been writing code, architecting cloud solutions, building mobile applications and working in the cloud space for a while. I love working with startups (most especially builders) to discover the value of the AWS cloud. My interest Include software/mobile app architecture, mobile development and speaking at tech events. Live life and enjoy the beauty involved in building mobile applications. Follow me on LinkedIn: Olajide Enigbokan.