This demo provides live streaming services for streamers and you can join the streamer's channel and watch it. You can chat with streamer and other viewers. Moreover, you could send a heart to streamer when you want to show your love to the streamer.
IMPORTANT NOTE: This project is intended for education purposes only and not for production usage.
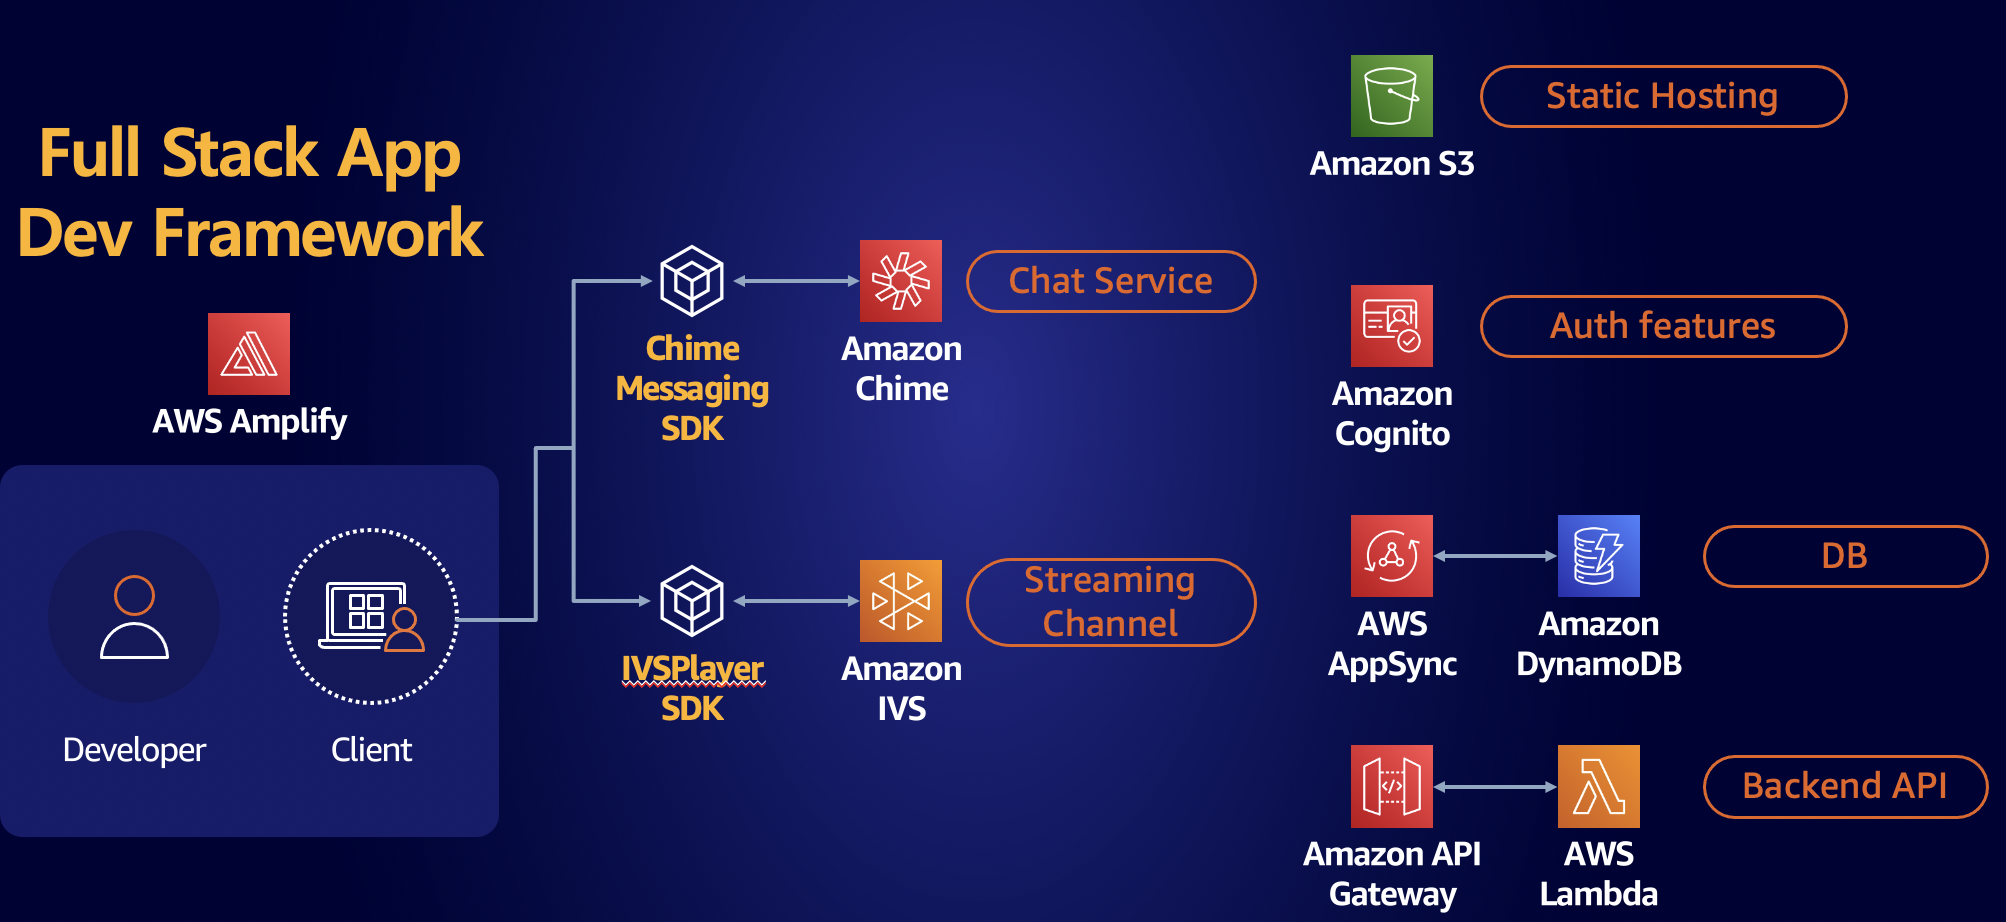
This demo is serverless web application, leveraging AWS Amplify. AWS Amplify provides set of tools and services that can be used together or on their own, to help front-end web developer build scalable full stack applications. You can configure app backends like backend API with Amazon API Gateway, AWS Lambda and auth feature with Amazon Cognito, DB with AWS AppSync.
The streaming feature leverages Amazon Interactive Video Service. Amazon IVS provides streaming channel and Timed MetaAPI for interactive services like poll, Q&A, Heart button. To interact between streamer and viewers with chatting, this demo provides messaging chat feature with Amazon Chime SDK messaging.
IMPORTANT NOTE: Deploying this demo application in your AWS account will create and consume AWS resources, which will cost money.
To start demo quickly, follow the instructions as below.
- Click
Launch Stack

- Input Parameters
Check Available Region of using Amazon IVS and ChimeSDK Messaging. Default is us-east-1

- Click
NextandCreate stackwith acknowledgement check

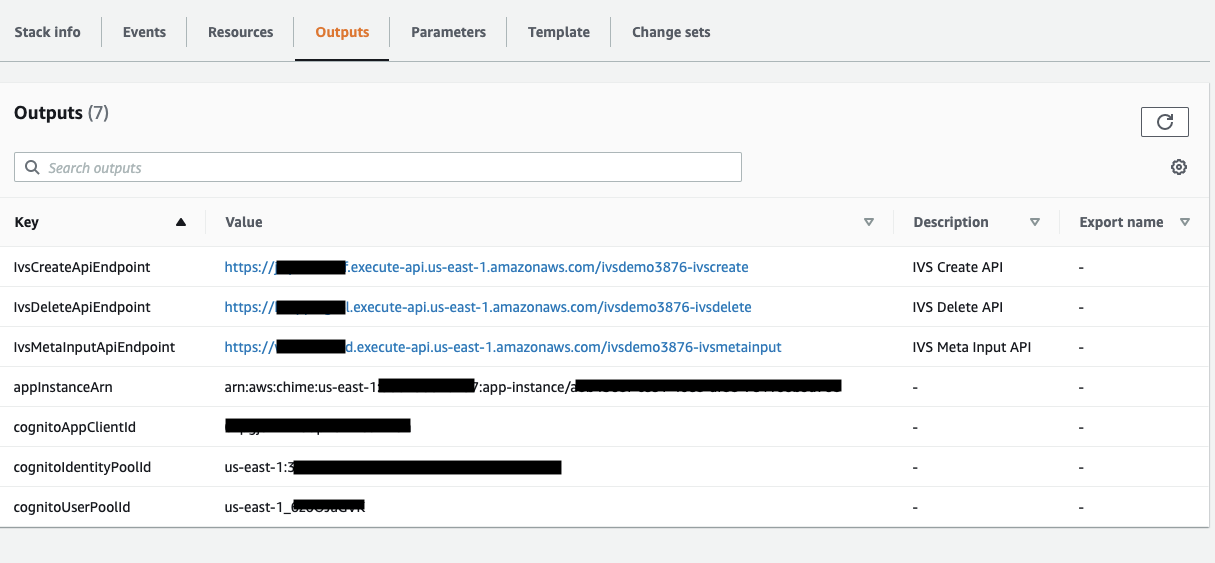
- Get outputs from CloudFormation stack
- clone repo to your local
- go to root dir of repo
NOTE: If you are using Cloud9 for demo, you have to increase volume size of Cloud9 Instance. Run script
resize_volume.shbeforenpm install.
-
If you are using Cloud9
- Go to Root Dir
chmod +x resize_volume.sh./resize_volume.sh- This script only works in Amazon Linux Cloud9. If you are using Ubuntu Cloud9, change script
yumtoapt-get -y.
-
Copy & paste API endpoints to
src/config/apiConfig.jsfrom CloudformationApiEndpointoutputs

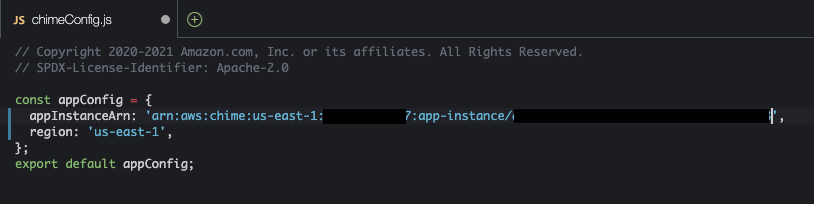
- Copy & past ChimeAppInstance ARN to
src/config/chimeConfig.jsfrom CloudformationappInstanceArnoutput
- Run command
npm install -g @aws-amplify/cli - Run command
amplify configure - Set up Region and IAM User which you want to set.

- Run command
amplify initin root dir of repo
Enter the input value by referring to the following.

- Run command
amplify import auth - Select Cognito which is created in CloudFormation

NOTE: AppSync in Amplify cli slightly changed. Please follow as below to add AppSync API.
-
Run command
amplify add api -
Select
GraphQL -
Select
Authorization modes.
-
Select
Amazon Cognito User Pooland type 'N' which we will not configure additional auth types.
-
Select
ContinueandBlank Schema. -
Select
Yto edit schema. -
Result as below. Open graphql schema file. file path is as below.

-
Copy schema from
src/config/schema.graphqlto schema file like as below. -
Save it.

-
Run command
amplify push -
Type
Yesto continue -
Type
Yesto create GraphQL API -
Select
javascript -
Press
ENTEREnter to select file name pattern of graphql queries to default -
Type
Yesto generate/update all possible GraphQL operations -
Press
ENTERto maximum statement depth as default

- After updating resources is done, Check with
amplify statuscommand

- Go to root dir of repo
- (For one time) Run command
npm install - Run command
npm start
- Click
Create Channel Buttonand create channel!

- If you click
My Channels, You can see your channels.
You could join the other channel and enjoy it.
You can stream your contents using OBS.
- Click
CHANNEL INFOinMy Channels.

- Get
INGEST ENDPOINTandChannel STREAM KEY. - Input to OBS Application and stream it!
Start OBS > Settings > Streamand input ingest endpoint and stream key.
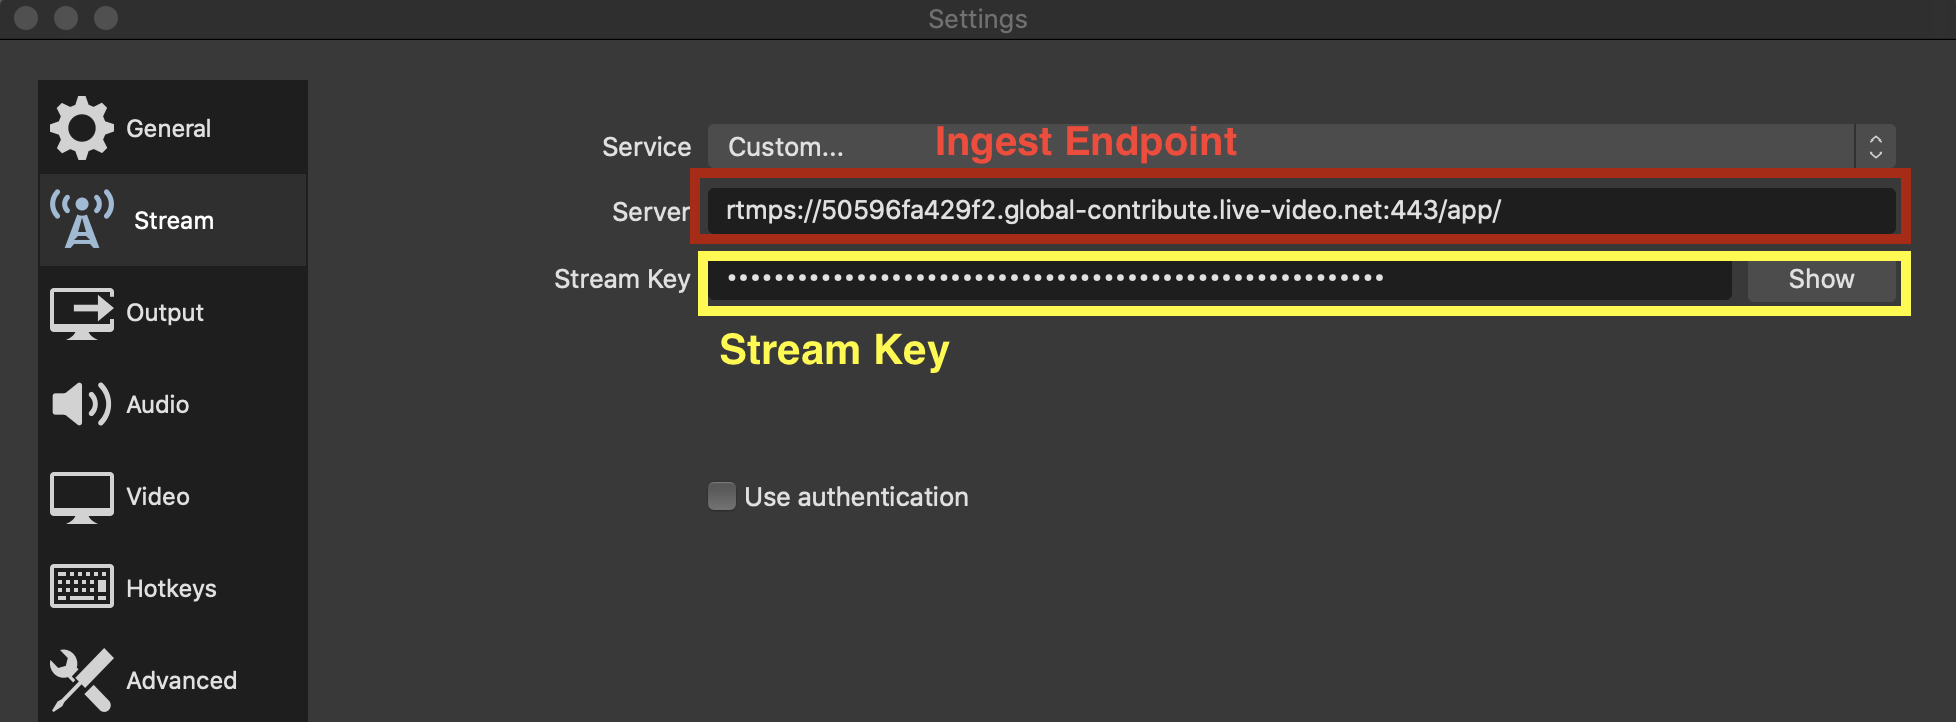
- Start Streaming and enjoy Demo!
- Remove CloudFormation Stack
- Remove Amazon IVS channel which you made
- Run Command
amplify delete
- Amazon IVS React Feed App Demo
- Amazon ChimeSDK for JS
- Amazon ChimeSDK Component Library React
- Semantic-UI-React
This sample code is made available under a APACHE2.0 license. See the LICENSE file.