AWS Database Blog
Automate benchmark tests for Amazon Aurora PostgreSQL
Optimizing a database is an important activity for new and existing application workloads. You need to take cost, operations, performance, security, and reliability into consideration. Conducting benchmark tests help with these considerations. With Amazon Aurora PostgreSQL-Compatible Edition, you can run multiple benchmark tests with different transaction characteristics matching your data access patterns. In this post, we provide a solution to automate and scale benchmark tests. The solution supports running multiple workloads utilizing multiple client instances, which gives you the ability to create realistic benchmarks.
Overview of solution
The solution provides the ability to run a benchmark test across Amazon Elastic Compute Cloud (Amazon EC2) instances, and multiple benchmarks may run concurrently. For instance, one benchmark performs select, update, insert, and delete on an Aurora writer node. At the same time, another benchmark performs select statements on an Aurora reader node. The following diagram illustrates this architecture.

To create the automated solution, we configure pgbench as the benchmark tool, an EC2 launch template scales the number of instances, and AWS Systems Manager Run Command performs the benchmark test on each instance. To implement this solution, we complete the following high-level steps:
- Create schema objects.
- Configure an EC2 instance.
- Create an EC2 Amazon Machine Image (AMI).
- Create an EC2 launch template.
- Launch two groups of EC2 instances: one for write activity and another for read activity.
- Run benchmark tests using Systems Manager Run Command.
Prerequisites
For this walkthrough, you should have the following prerequisites:
- An AWS account
- Amazon Virtual Private Cloud (Amazon VPC) with three private subnets
- An Aurora PostgreSQL DB cluster version 12.4 or later
- An AWS Identity and Access Management (IAM) instance profile for Systems Manager
- A launched EC2 Linux instance
- psql client with connectivity to your Aurora cluster
- An Amazon Simple Storage Service (Amazon S3) bucket
- A Gateway VPC endpoint to privately access Amazon S3
- Familiarity with Aurora, Amazon VPC, Amazon EC2, Amazon S3, and IAM
License for code samples
Database schema
To demonstrate how to customize the benchmark test to your schema and data access pattern, we use three tables and three sequences instead of the default pgbench TPC-B benchmark.
Because one of the prerequisites is psql, start with connecting to your Aurora cluster. To connect to your Aurora PostgreSQL database with psql in Amazon Linux, use the following format:
The following code provides the sample database schema used in this post. Create these objects in the Aurora PostgreSQL database you plan to use for the benchmark test.
Configure your EC2 instance
Log in to the EC2 instance in your account. We use PostgreSQL 12 for this example, so we need to configure the PostgreSQL client. This requires the amazon-linux-extras repository installed on your instance. If the amazon-linux-extras package isn’t installed, use yum to install it.
- Enter the following code:
- Create a file named benchmark.sh in /home/ec2-user/benchmark/:
- Add the following code to benchmark.sh:
- Make the file executable:
- Create a file named transaction_group_1.sql, which is used by pgbench to generate write traffic to the writer node:
- Create a file named transaction_group_2.sql, which is used by pgbench to generate read traffic to the reader node:
- Copy the files you created to S3:
This step is optional and not required to complete the automated benchmark test. However, having the files in Amazon S3 allows you to quickly modify benchmark tests, and distribute SQL changes to your EC2 instances with Systems Manager.
Your EC2 instance configuration is finished. Next, you create an EC2 AMI and launch template.
Create an EC2 AMI
To create an EC2 AMI, complete the following steps:
- On the Amazon EC2 console, choose Instances in the navigation pane.
- Select your EC2 instance.
- On the Actions menu, choose Image and Create Image.

- Enter an image name and description.
- Choose Create image.

Create an EC2 launch template
To create an EC2 launch template, complete the following steps:
- On the Amazon EC2 console, choose Launch Templates in the navigation pane.
- Choose Create launch template.
- Enter a name and description.

- Enter the AMI you created.
- Pick an instance type.
- Specify a key pair.
- Select Virtual Private Cloud (VPC) as your network platform.
- Provide one or more security groups.
- Leave the storage and resource tags set to their default values.
- In Advanced details, choose the IAM instance profile you created as a prerequisite.
If you leave this field blank, it’s not included in the launch template.
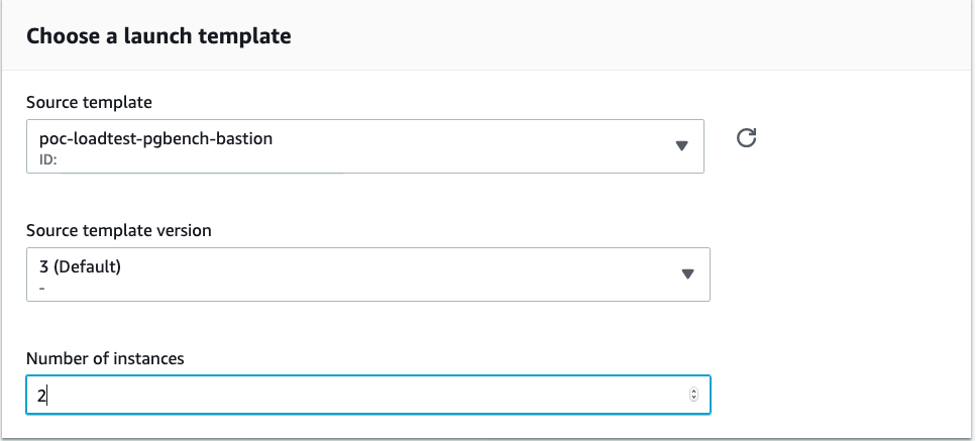
Launch your EC2 instances
To launch your EC2 instances, complete the following steps:
- On the Amazon EC2 console, choose Launch Templates in the navigation pane.
- Select the launch template you created.
- Choose Launch instance from template.
- For Number of instances, 2 (you can change this depending on your needs).
- For Networking platform, select Virtual Private Cloud (VPC).
- Choose a subnet.

- Choose Add tag to add a resource tag.
- For Key, enter
benchmark. - For Value¸ enter
transaction_group_1.

- Repeat this step for another group of instances, but this time for the resource tag enter
benchmarkfor Key andtransaction_group_2for Value.
You now have two groups of EC2 instances. Each group is identified by a resource tag:
- Group 1 is tagged with
benchmark:transaction_group_1 - Group 2 is tagged with
benchmark:transaction_group_2
Run a benchmark test on each group
We’re ready to run the benchmark tests. In this step, we run pgbench concurrently on four EC2 instances. On two EC2 instances, write traffic is sent to the Aurora writer node, and from the other two EC2 instances, read traffic is sent to the Aurora reader node.
Group 1 (transaction_group_1)
To test transaction_group_1, complete the following steps:
- On the Systems Manager console, choose Node Management in the navigation pane.
- Choose Run Command.
- On the Run Command page, choose Run command.
- In the search bar, enter
AWS-RunShellScript. - Select AWS-RunShellScript.
- Under Command Parameters, enter the following code (replace the connection environment variables with your specific connection data):
We recommend following best practices and the principle of least privilege. See the PostgreSQL documentation for configuring client authentication.
- For Targets, select Specify instance tags.
- Enter
benchmarkfor the tag key andtransaction_group_1for the value - Choose Add.

- Choose Run.
This runs pgbench on the EC2 instances tagged with benchmark:transaction_group_1.
Group 2 (transaction_group_2)
The group transaction_group_2 generates read activity on the reader node. Repeat the steps followed for transaction_group_1, with the following changes:
- Change the connection environment variables to point to the reader node
- Change
BENCHMARK_SQL_FILE=transaction_group_1.sqltoBENCHMARK_SQL_FILE=transaction_group_2 - For the resource tag, enter
benchmarkfor the key andtransaction_group_2for the value
The walkthrough is complete; you have one group of EC2 instances sending write traffic to the writer node, and another group of instances sending read traffic to the reader node.
Monitoring
A variety of tools are available to monitor your database while conducting benchmark tests, including Amazon RDS Performance Insights, Amazon RDS Enhanced Monitoring, Amazon RDS database logs, and Amazon CloudWatch.
Clean up
To avoid incurring future charges, delete the resources you created from following along with this post.
Conclusion
In this post, we provided a solution to automate and scale database benchmark tests on Aurora PostgreSQL using an EC2 launch template and Systems Manager Run Command. The solution provides the ability to scale your benchmark test across multiple EC2 instances, and have groups of different SQL statements running concurrently.
As you modify your benchmark tests, I encourage you to experiment with Systems Manager Run Command to modify the benchmark files in Amazon S3 and copy them to the EC2 instances. While running benchmark tests against your database, it’s important to optimize cost, follow best practices, and create relevant benchmark tests matching your workload data access patterns.
About the Author

Andrew Love is a Sr. Solutions Architect in Federal Financial Worldwide Public Sector at Amazon Web Services. He is passionate about helping customers build well-architected solutions to achieve their business needs. He enjoys spending time with his family, a good game of chess, home improvement projects, and writing code.